ArmA 2 Campaign - Harvest Red
First to Fight
The campaign begins with you in the middle of a firefight. After a brief fade to black you are in control of your character, but no matter what you do you are hit, but as it turns out you were daydreaming during the briefing.
Shaftoe walks up and you are directed to follow him for a more detailed briefing. You can ask one of three questions, but it's not really necessary. You then can opt for training or crash until morning. I took the training option.
The first is a mandatory obstacle course, which is easy if you know the C, X and Z keys for stand, crouch, and go prone. You can also practice skeet and rifle range shooting, these are optional. The rifle range is pretty easy, the skeet harder.
You must report in, here you can shoot the breeze or just wait. Shooting the breeze just gives a bit of extra dialog. The mission ends with a cut scene of flying off in a chopper.
Into the Storm
As explained earlier your mission is to find the radio station and direct the air strike against it. You get the task of "lighting up" the target with the laser designator. Take it when instructed to do so. When the chopper lands get out and
proceed to RP Keyhole. Wait for the rest of your squad to show up. You will get a cut scene, then orders to move out. Go towards the waypoint until you get within 100 meters, then go towards the right instead of straight in, this will give you better
cover. Enter the building as shown below and SAVE.
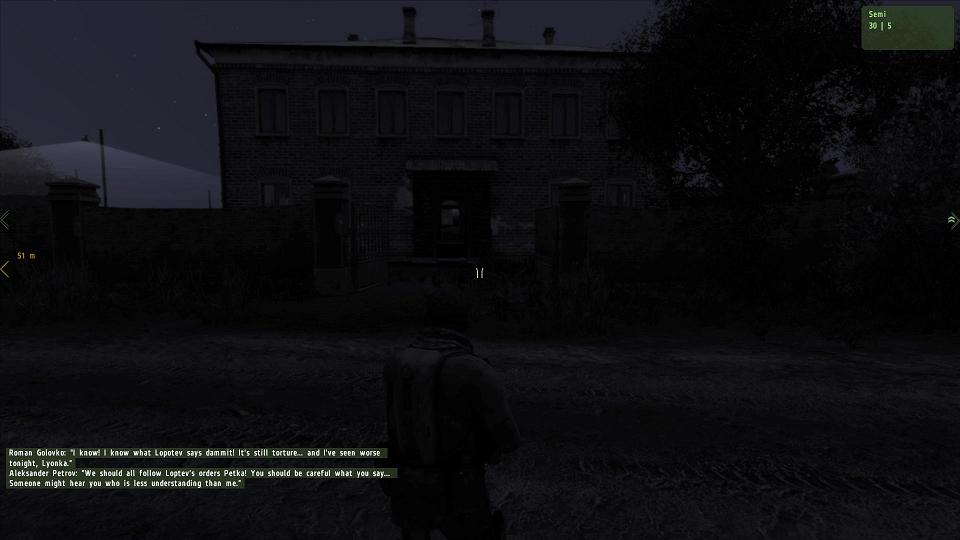
You will encounter a hostage situation. You will also discover the radio station. Take out the guard on the other side of the wall at 11 o'clock, he proved to be more dangerous than the guards inside. Take
out the other two guards and hit the dirt. When you are asked if you want to help rescue the hostage, answer yes, as you have already done so. Approach the prisoner and you will enter a dialog. Have him wait there while you tell you CO to call off the air
strike as there are too many civilians close by, and that you are going to do the job with a Satchel. Go plant your bomb. Take out
any soldiers you need to. Plant the bomb between the tower and the radio van and set it on a 600 second timer. This will let you accomplish other goals before you raise a big commotion. You can always touch it off manually once everything else is done.
Go back to the doctor, tell him to follow you and escort the doctor to the indicated waypoint. If you don't have the correct waypoint, switch to map view, then set Escort Dr. Sova as current task. Once that is done you can touch off your bomb. Doing it this way you don't have so far to run to get
to RP liquid. But first you want to check the town for other evidence of war crimes. Go to this farm shed at 091115.
There you will find a female captive. When you talk to her, choose the 2nd option first. She will ask you to take her to Dr. Sova, who you already rescued. If you choose the first option, she will panic and flee, making the rescue a failure. When you
get here there, your CO will ask about searching for the mass graves. Take the option. She will mark the mass grave on your map. It will be easy to spot, there are three trucks parked around it. SAVE Head to RP Madison. There you will get a choice to retire for
the night or laser mark targets.
Of course I chose to laser mark targets. Go to the next waypoint but watch out for an enemy medic as you approach and there is an enemy machine gunner right at the place you want to be. Once the two tangos are down go to the vantage point and lase the
building indicated by the red smoke. The next target is a camouflaged tank It is off to the left, you'll have to climb to a precarious place to mark it. Then there is a T-72 out in the open, mark it to complete the mission.
Amphibious Assault
Follow orders, you will be given a target. Go just enough past the pine trees to shoot the soldier, crouch so you are not as much of a target. When your target is down, hit the dirt, your M4A1 is no longer wearing the silencer so your first shot is going to get noticed.
Don't run ahead, keep with your squad and engage targets as called out. Eventually you will meet up with another friendly squad in Chernogorsk ending the mission.
Harvest Red
Razor team is called in to join on the siege of Chernogorsk. You are now in command of a small squad. You start out on the roof of a building, go down the stairs to ground level, your squad is already ahead of you. Once at ground level order your troops
to fall in and head for the next waypoint. You will let a call from Reaper that they are being pinned down by a sniper. Continue to the waypoint avoiding contact with enemy armor, you have no AT weapons. As you get close, Reaper will tell you the sniper's
position and mark it on the map. Approach from the SE and he won't spot you before you can get him. Can't find him? See the screen shot.
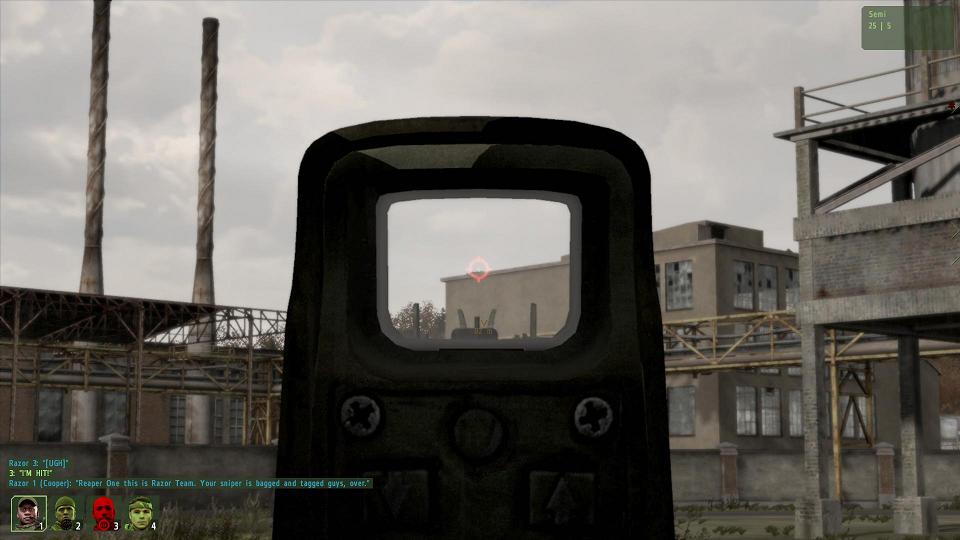
Don't take too long in shooting him or else an NPC will claim your prize. After the sniper is dealt with you will get a call to capture Lopotev. Proceed to the indicated waypoint. Once all of your team are in the area, you get a cutscene, what goes on you have
no control over. You are riding with the captured Lopotev and your truck gets hit with a bomb. You wake up captured by the enemy. You are eventually rescued, but Lopotev has escaped and Miles (the commander of your squad) is KIA.
Razor Two
Synopsis:
You now are tasked with finding Lopotev, again. However it is not possible. During the briefing with Dressler you will be given the name of another person to capture, Bardak. There are four possible places for him to hide out, but if he is not found in an hour
or so he will flee to the Russian border and the mission will be a failure. In order to have a Flawless Victory, you must capture him alive. It is possible
to do so, if he is in a car run it off the road or shoot out the tires, but make sure you don't kill him. Once the car is disabled he will get out and the game will arrest him. If you find him not in a vehicle it will be easy to walk up and arrest him, he is unarmed.
Details:
During the intro, choose option 1. Grab a hummer and head to Elektrozavodsk. Talk to Captain Dressler. He will tell you three good places to search, another contact, and another person, Bardak, to capture. Go to the tent with the green flag. Interview Lt Marney.
Go to Vyshnoye via Mogilevka. Don't waste your time with the camp at 111112 or the second camp at 112092, the first one has already been cleared and the second one is deserted.
Watch out for enemy just north of Mogilevka. Once you get to Vyshnoye talk to the man by the water pump. He will mention a man named Malek and a farm south of you. Go to the farm, parking your hummer facing due east. and talk to the person inside.
Be polite and he will tell you to check out the castle. The reason you should park the hummer facing east is that there is a chance Bardak may show up in this area! Walk to the castle.
Next to a pup tent on a bench is a map case. Take it, it's a piece of evidence, also check for Bardak.
Now head cross country to the camp at 083078, avoiding contact with the T-72 in Stary Sober and the Shilka in Novy Sobor, you are no match for them. This camp is active, so SAVE when you are about 200 meters away.
Put your men in danger mode but watch your fire, there is a chance that Bardak will be here.
Once it is clear enter the tent and pick up the photographs, this is a second piece of evidence. Now go southeast to Staroye.
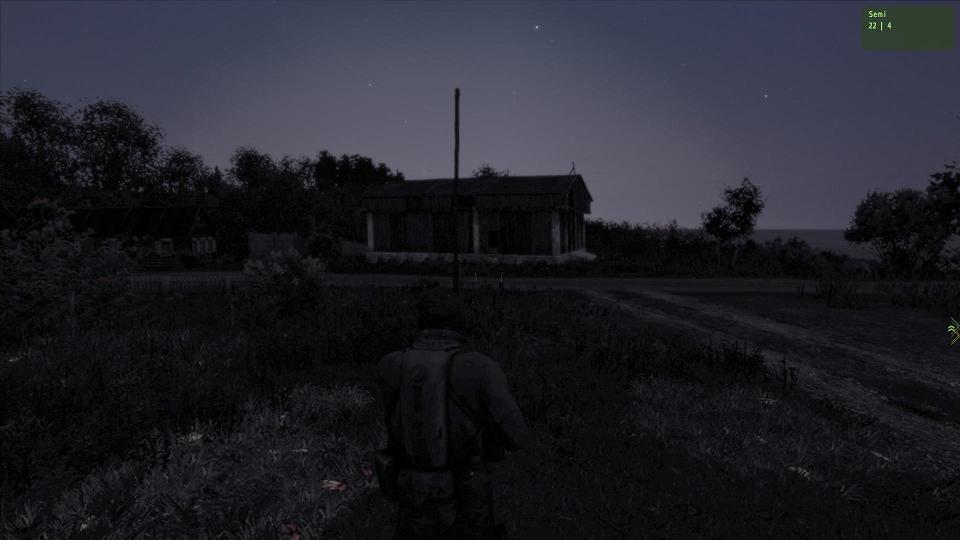
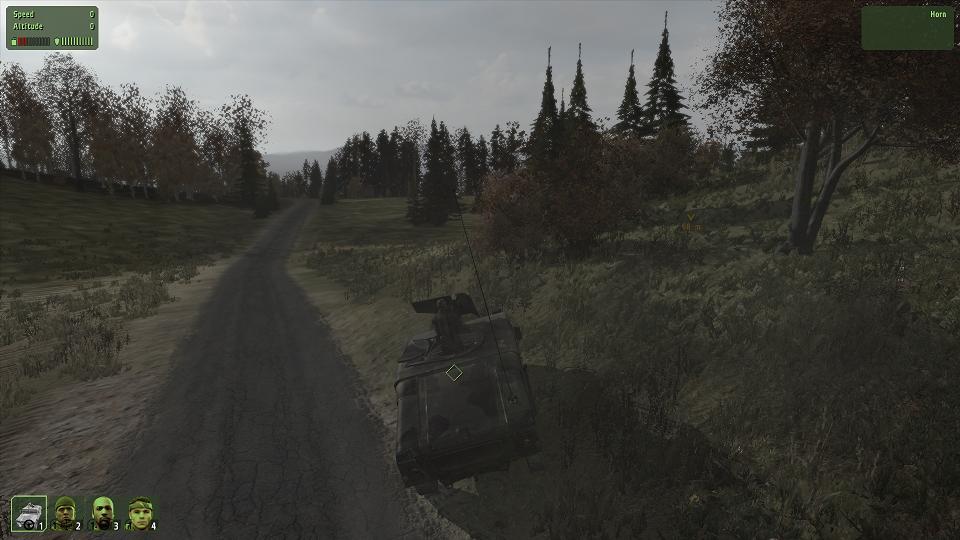
When you arrive at the center of town there will be dialog with a farmer in town. Follow him in your hummer to the cow shed and disembark. If you lose him, this is what the cow shed looks like.

Have your men engage at will. You may need to call out targets. Once all enemy are gone, find the farmer (you may have to use the map) and follow him. Use the X4 command to speed things up if necessary, one time I played it he crawled.
You will then get a suggestion that Bardak may be back in Elektrozavodsk, at the power plant. It so happens that the cow barn is next to a power line right of way.
Follow the pole line south to the power plant, there may be enemy along this route but your hummer gunner should be able to take care of any trouble.
You can also go back via the road. There is a good chance you will arrive to find the power station deserted except for an ill tempered gate keeper. He will tell you to search Solnichniy, head there via the coast road.
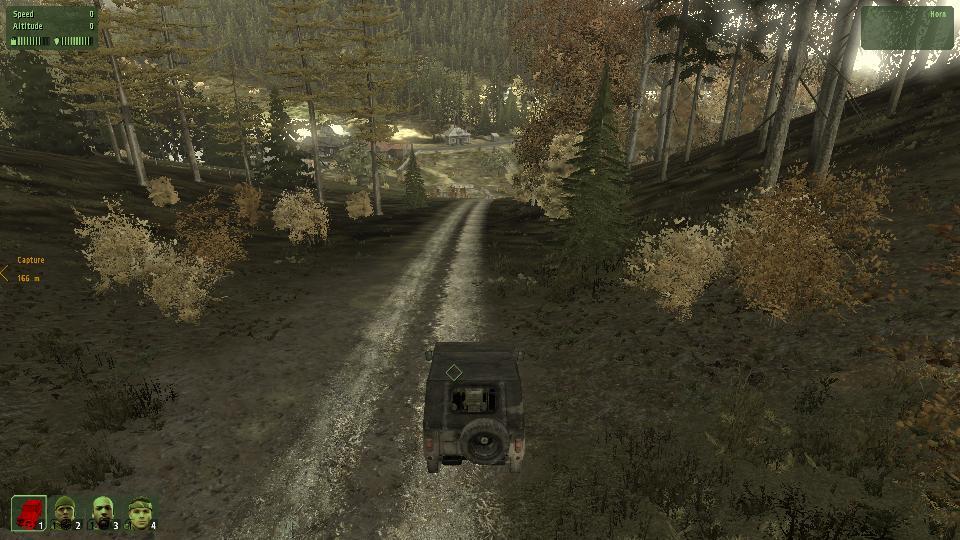
Look for Bardak in the quarry just southwest of Solnichniy. In the quarry are dog tags, the third item of evidence. If you can't find the dog tags yourself order one of your squad to take them. If you have not found Bardak by now, head to Gorka via Berezine and wait,
Bardak should be coming from the south. If you have not done so earlier this would be a good time to top off your fuel tank as you leave Solnichniy. If the radio call has already come though stating that Lopotev is in route from Shakhova, chances are you
are too late, unless you are already in Gorka. If you are in Gorka, head south to Shakhova, you will be able to intercept Bardak on the road south with no trouble.
One Week Later
The mission starts out with riding on an MVTR with bicycles. You are auto ejected and the first task is to ride about 300 meters on bicycles to LZ Oregon. BUG ALERT For some reason, you squad gets off 200 meters away from the chopper and walks the rest of the way.
Order your crew into the Ospry then get in yourself. A cutscene in the chopper with some dialog and the mission ends.
Manhattan
Actually you are still in the Ospry. The first task is to report to Cpt. Shaftoe. You are auto ejected near the entrance to the base, but you may have to order your squad out. Go to the main gate for a short cutscene. Then get in the hummer parked near the guard shack and up the hill. Report to the officer
with the laptop. There you will get a big list of tasks. There seems to be no particular order in which you need to do these. You have a choice of a hummer, LAV-25 and a AAPV7A1 for transport, as well as the hummer you drove up in. Whatever you drive, take
good care of it, there are no repair facilities. The LAV-25 is the best of the lot. It's pretty good up hills and it has more armor than the hummer, you can run into a lot of stuff and not damage it.
You can also use the UAV terminal, but you cannot control where the plane goes, just the look angle. You can also call in artillery strikes, however: You are allowed one and only one arty strike so don't use it until you really have to.
Keep the hummer since it is faster going up hills. Arrest Kikolayev first, since is location is less than a km away from Star Force Base.
Someone does not want Kikolayev taken alive, his house is bombed as you approach. You may see a man, but he usually will be killed in the explosion. You still get credit for this task, so arrest Lagushina next. Go to Krasnostav. On the way you get a radio message about a bombing in Red Square, but it
is not germane to the game yet. If you get to Krasnostav between 11:00 and 12:30 you will find her in front of the church.
The arrest will go smoothly BUT Pull the hummer up close to her so that she will get in, otherwise you will have to chase her later. You are instructed
to take her to LZ Jersey and the game auto saves. If any tangos show up have your troops clear the area before heading out. You will get credit for clearing a sentry camp by doing so. The game will auto save. Get your men in the hummer.
The road is safe, but when you get within 300 meters of the LZ, SAVE. Drive to the LZ, once the request is triggered, drive due east towards the woods, just behind the first tree line as shown.
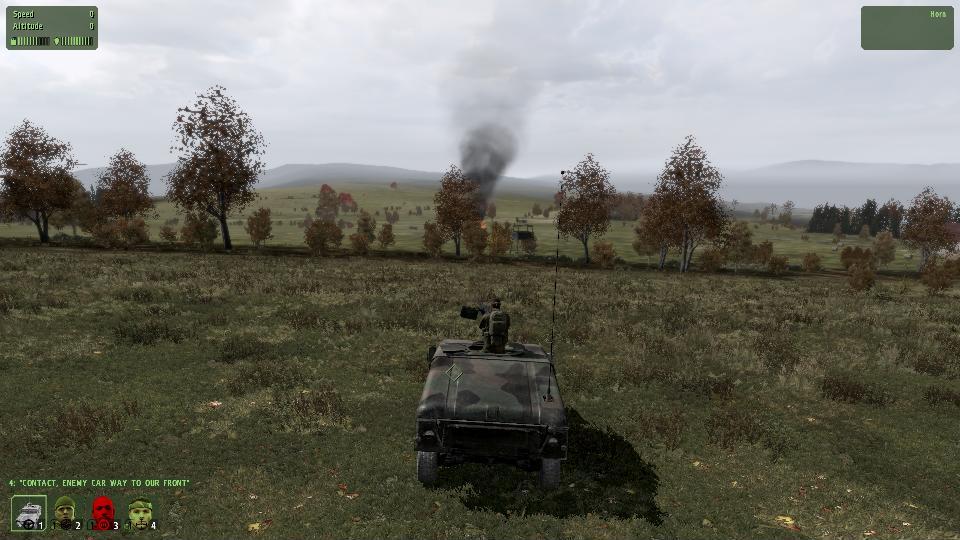
From that safe distance your gunner will be able to take out the two enemy UAZ that show up without much trouble. Drive back to the landing zone when your chopper arrives. Don't worry if your prisoner appears to run off, the chopper pilot will still say she is aboard.
If it doesn't work out, Revert to your save point and try again.
Once the chopper takes off and the game auto saves go into the woods indicated in red on the map. There is a sentry post at Black Mountain and one at the other focus of the red ellipse. Put your men in danger mode and carefully clear the two camps.
Be careful! Even if the system says you have cleared the camp, there may still be enemy about. After these two camps are clear in ver 1.02 you can return to base, even though you have not cleared other camps, you will get credit for this task. For 1.03 you
need to find and clear at least 4 camps.
Next head to Gorka. You'll find the weapons cache behind the church, and the priest runs out. Say you aren't going to report it and he'll give you a lot of intel. Follow this link to see how the game plays out if you report the cache
The game will auto save. Head to Novy Sobor,
you can go by road, there is no enemy activity there at present. Go to the large farm building at 069076.
There you will get a cutscene in which you are told there are 6 insurgent sentry posts and the approximate location of the main camp. The location will be at either 088048 or 102019. Before leaving, fuel up at the gas station east of Novy Sobor
you are probably down to 1/2 a tank by now. If you want a little diversion, check out the church, it is an enterable building and pretty nice inside.
Go to Gvozdno, although if the main camp is on the way there, you might want to clear that objective first, see below. If you are lucky, you will find the Gun runners truck in Gvozdno, finishing that task.
Even if you don't find the gun runner here, wander around town eavesdropping on various conversations and listening to the broadcast radio with news about Russia.
Someone is trying to blame the Moscow bombing on the NAPA group you have been friendly to, the bombing is probably a false flag attack.
When you are close to the area where the main camp is, SAVE. Although the game auto saves after you spot the camp, it is usually too late for you to avoid getting blown away by a T-72.
When you sight the main camp, follow orders, do not engage, there is no way you can stand up to the tank and BMP without backup. NOW is the time to call support. The T-72 is your biggest problem, so order a guided armor strike. BUG ALERT
Although "Boomerang" says they are ready to rock on your order, there is no way to do it. The communications menu is blank. However, if you check the map, Boomerang seems to be moving on their own.
Just sit tight and let the NPCs do most of the work. Once it looks like progress is no longer being made, move in with your APC. If you have trouble finding the last enemy loon, run over the field hospital, they will be hiding in there.
If you haven't found the gun runners yet, the eastern end of their route is 098029, from there, they go west go Gvozdno, 084049, the intersection at 072054, just north of Grishino, just north of the airport, 022044 and their main cache at the
western end of the route is at 020037.
Now that it's later in the day, return to base and give the UAV another shot. Now the picture is better and you can spot enemy light armor and aircraft at the small airstrip northeast of Krasnostav. The gun on your APC will make fast work of the squad
near the choppers. You will also find a lone soldier standing near a repair truck.
Oddly enough, your troops won't call him out or fire on him. But if you get out of the APC and try to approach him, he will fire at you. If you wound him he won't fire back and he will confess that he is Nikola Nikitin. The game gives no other option than to kill him. You
have to do it yourself, you can't even order your troops to finish him off. Once he is dead it will be confirmed that this was the enemy leader you were looking for and you get orders to return to base. RTB and report to Cpt. Shaftoe to end the mission.
Bitter Chill
The marines have been ordered out of the area. You last task is to go to Spukayevas house secure the "Operation Cobot" files linking Chedaki involvement in the Moscow bombing and destroy everything else. The only vehicles available are a
truck and a hummer that's almost out of fuel. Take the hummer anyway and don't take time to refuel, you need to get to the house before the Chedaki do. When you get here
SAVE, then get everyone out weapons hot. However, if you get there fast enough, you will be able to recover the documents, blow up the house with your satchel and be out of there before anyone arrives. It seems like you are home free, but the radio
chatter from Manhattan base is cut off. High command orders you to investigate. You will be under fire as you approach, but just keep going, your gunner will be able to keep you alive and down a few hostiles.
You get a cutscene that you have no control over. You find out from the survivors that the Chedaki attacked the base, perhaps with Russian SpetNatz help and they are after the Razor squad (you).
When you regain control, you might find yourself under fire, be ready. But you will find friendly NAPA forces to the east. They offer to give you a ride. Take it, as the Russians have SAMS that will take out the chopper if you call for extract.
Once your conversation with HQ is over, follow the NAPA leader, he knows the only safe way out of there. He will lead you to a red hatchback. Get you and your troops in and enjoy the ride. Unfortunately Russian road blocks are everywhere and you
can't make it to the pickup point. There will be a dialog and a choice to find NAPA or CDF, choose to head to NAPA on foot. Follow this link to see how to play it if you decide to choose CDF. Avoid contact if possible. Don't head directly to the waypoint, too much armor that direction.
Head due east until you are in the woods, then turn north. When you get to the waypoint you will get a cutscene in which you are declared officially MIA but are instructed to work covert operations with NAPA. The mission ends after the cutscene.
I also tried to play this mission by setting the bomb on a 10 minute timer, so that the attack on FOB Manhattan does not get trigged until safely away. This does work up to a point. There is no attack, and you can call the chopper in for extract,
but it gets blown out of the air by a SAM and you die, so the only known way to play this mission is as described above
Delaying the Bear
Continuity Alert! You start off at a point southeast of where Bitter Chill ended, and the map shows you going back to the original location. I'm not even sure why this mission is in here, as Badlands also starts near Novy Sobor.
Go to the Nearest waypoint. Order your troops in the truck before you get in, else it may drive off without them. The truck drives about 300 meters or so and the lead car is ambushed and you are auto ejected from the truck, changing your plans.
Go to the new rally point. Do not head directly there, go east into the woods and use the forest and terrain for concealment and cover. The mission ends when you reach the backup convoy.
Badlands
Your task is to take four villages, starting with Novy Sobor. You now have the option of commanding the NAPA units as well as your own squad. Use control-spacebar to switch command modes. The NAPA squads main skill is getting killed, so leave
them behind at first. The game now plays much like "Warfare" but there
are no respawns. Don't go straight in, but go west and approach along the road, taking the first Strongpoint. SAVE. Then take cover with your squad (you'll have to command them to specific locations, otherwise they will stay out in the open) behind
the red brick building SAVE then peek out to engage targets as they approach.
Your biggest headache will be 3 UAZs. Once you clear Noby Sobor you get several long and somewhat confusing cutscenes. At the end of the cutscenes have your medic heal the civilians, you get an APC that can be deployed as a MHQ to start your base.
Move the APC to 062085 before you build the base, that is more centrally located to the objectives, and far enough away not to be attacked. Set up the HQ, build a barracks and with the cash buy an RPG launcher and three rounds for yourself.
Now call the other squads in to guard the base. If you have enough money buy an RPG soldier. Next attack Stary Sobor, although it is easy to reach the HQ stronghold and "take&qout; the objective, be aware that there will still be hostiles that
you have to eliminate. You will need all three rounds to dispatch enemy APCs. Watch your fire, there are friendly NPCs that show up as well. When all enemy near Stary Sobor have been eliminated, RTB.
You should have enough supplies to build a heavy factory, if not wait a few minutes. Replenish your RPG rockets. Although you have enough money to by a (APC), it will just be rocket fodder for the enemy RPG soldiers. Spend the money instead on
8 infantry. Add a couple of machine gunners another RPG solider and the rest plain infantry. Attack Rogovo by having everyone hold fire, approaching within 300 meters, then go prone and stealth. Crawl in until at least 4 men say that
they are ready to fire. Have them open up, taking many by surprise. After Rogovo is cleared you will get a radio message. This is a critical choice
in the game! Depending on what you do here, the game will branch into two possible paths. However it is possible to win the war either way. Follow this link to see how to play it ignoring the radio message (option 2) thereby not killing Prizrak.
If you take option one the game will say the current task is to assassinate Prizrak "Borrow" the open truck
located at 046085, get all your men in and head to the indicated waypoint. There you will get a request to defend the village of Vishanore against an attack. Say that you will help. Head to the next waypoint. You will be reminded of the assassination.
It's on the way to Vishanore if you go as the crow flies. You will find that your target is the priest that you met at the weapons cache in Manhattan who is also the evil Prizrak. You can't talk him out of anything. After you kill the priest, postpone the
defense of Vishnore unless you want a very frustrating bloodbath. RTB and rearm. Then head for Pogorevka Park the truck in Rogovo and continue on foot to Pogorevka. Once you take Pogorevka, the mission will conclude successfully, with NAPA and CDF now allies.
Dogs Of War
You are tasked with clearing all towns in the northern provinces. You have the choice of being in command or having an AI commander. Let the AI command. Get in a UAZ and take each area in turn as ordered. Don't worry if it says you "failed" because
sometimes friendly AI troops will take the town before you do. It's a cakewalk until ordered to take Nadezhdino, although sometimes you will lose a town, if that happens the AI will instruct when to recapture it. Get yourself some night vision goggles off
a dead officer while the going is easy, you will probably need them later and you won't be able to buy any at the base.
There will be a grenade launcher at Nadezhdino that will give you trouble as you approach. You can either stop here
and go on foot or try to rush past, hide behind the strongpoint then sneak up from behind and kill the operator. Vyshnoye will be next on the list and it is even harder to take. By now you have a good deal of money saved up, so this is a good time to
RTB and get some more powerful gear. The easiest way back to base is to go north from Nadezhdino until you find a power line right of way, then follow it west. The power lines end at a receiving station very close to your base. Once there, SAVE.
Then buy a MD-24D. Order the pilot out of the Chopper. Board the Chopper as pilot and have the original pilot get in back. Have your squad wait at the base where it is safe. Ignore what the AI commander says what to do next. Instead start looking
for the ChDKZ base (Spoiler: one possible locations map grid 115098) You know when you are near, because you will get shot down by AA fire, most other targets do not have very good air defense. After you die, revert to your save point.
This time purchase a T-72. Order the crew out, get in and order two of the crew to get in anywhere and have the third crew member wait with your team. Switch to drivers seat and head to where you saw the base. There is no easy way to get there, you
have to go somewhere else first. The best way to avoid contact is to follow the power lines south to the power station, the only place that might be a problem is passing Chernogosk. When you are near the power station, head north up the road, then
follow the power lines northeast. When you crest this hill SAVE.
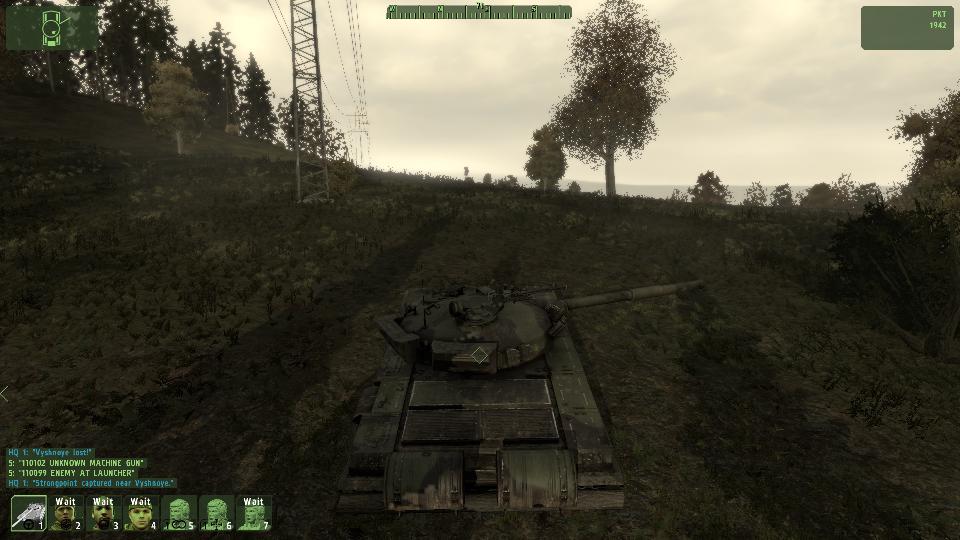
See the radar antenna on the pole revolving? Switch to gunners seat and order your driver to advance and use a Sabot round to destroy it. When your cannon has reloaded, advance and blow away the first armor you see, then back up while reloading.
You'll have a BDRM and a couple of BMP2s to deal with. Make sure that you get the BMP2s before they get you. If you have some damage, you might want to head west and take Strayoe first, then you can heal, repair and rearm before heading back to
Msta, the harder target. Head back from the northwest. You will have two T-72 to deal with at some point. Before you attempt to destroy the base you will need to take Msta first. The base structures appear to grow back as fast as you shoot them,
so get all the peripherals, such as mg nests, at and aa tripods first, then destroy the base buildings one right after the other, you will then get credit for destroying the base. Unfortunately, unlike the original "Warfare" destroying the enemy
base does not end the mission, you still have to capture all towns. Alternatively, you can simply take objectives as called for, and destroy the base when you get to Msta, but even with night vision, it's much easier to destroy the base during the day.
Now that the base is destroyed, work your way back to the next objective called for.
If either you or the AI take Mogilevka, you will get a side task about transporting an important prisoner. Ignore it for now, it is more critical to take as many towns as you can before it gets dark. SAVE as you take each objective.
You can also repair-rearm and heal at each town you take. The next place with heavy resistance will be Elektrozavodsk, be ready for at least one T-72 and some BMP-2s. It is best not to take it on until ordered to do so, as you will have AI reinforcements then.
Once it is dark, you can go to Mogilevka, at the indicated waypoint to pick up the prisoner. He won't get in your tank, so just park it, tell your crew to wait and take the 5 ton parked behind a wall across the street from the prisoner.
He will get in. Once he does, SAVE. You will need to ignore the waypoint, as it will point to the next town to capture, not HQ. Avoid contact, cutting cross country when it will save time.
Once your drop off the prisoner, buy a helicopter. While you are waiting for the chopper to be delivered, or soon after, the prisoner will tell of a radio station on an island to the east. Order the pilot out, have him wait for you, get in as pilot and
head for the waypoint. When you are within 1000 meters, SAVE. There appears to be nothing dangerous, but the side channel claims the site is heavily guarded and are ordered to take them all out. It turns out that the enemy is hiding in the woods, but your
gunner will be able to spot and eliminate many of them at the tower site (map grid 134120). Do Not kill the officers near 132121! Lobotov is among them and it is critical that he be taken alive. Make several passes until all targets at the tower site are eliminated.
Land at 136121 and SAVE. Get out of the chopper, leave your gunner behind. Verify that the tower site is clear and head west. Use this building for cover and SAVE.
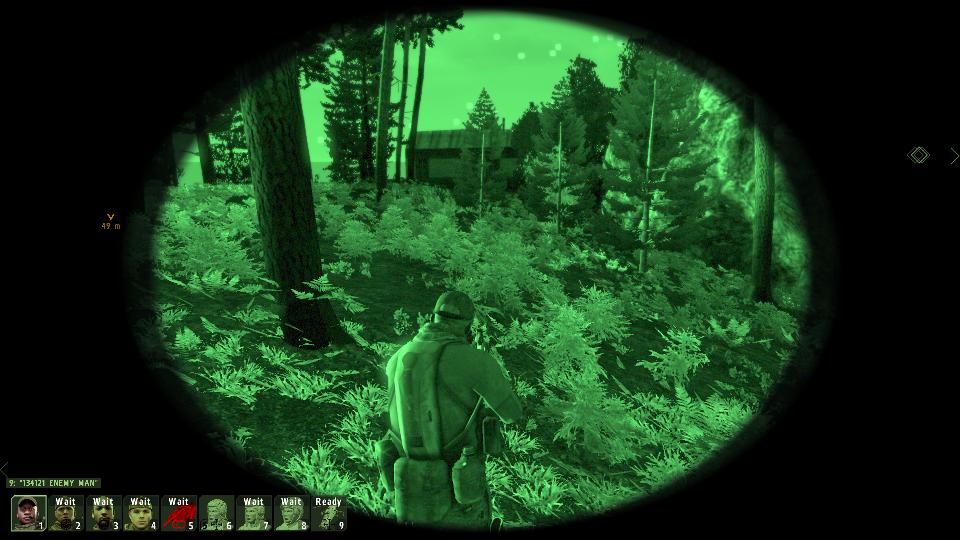
Go to the right, hiding behind the outhouse. Carefully peek around the corner and kill
the man lying in the dirt. Do Not kill the one in the dark uniform. Walk up to him and press the return key (or mouse wheel) for "greeting" This will arrest him, and call in a chopper for extraction. Sit tight, the chopper will land right
on your position and take you and Lobotov back to base. Once you get there, you have to transport Lovotov to the Russians. Once at the checkpoint, Spetznats try to kill Lovotov.
Bug Alert! Even though you thought you left your squad safe and sound at base, they wind up with you after the cutscene.
When you get control, run back over the bridge with your squad and have them hide under the bridge. Then head to the north side of the building on the left, there you may find 3 spetznats with an RPG ready to take out the truck! Kill them all! If
you don't find them there, carefully work your way around south, kill all spetnatz, saving after every kill. Once you get "Shagarov got him away", head back over the bridge, but stay away from the truck. You'll get some side chatter and the
"Dealing With Russians" task is completed. If you are lucky, the north will be announced as clear, and you will get a "Flawless Victory" briefing screen. This will lead to
War That Never Was
You are successful and have assassinated Prizark; this unites NAPA and CDF: You get a closing cutscene in which officially nothing ever happened, but you get recognition for your accomplishment.
Other Possible endings
There are four other possible outcomes:
New Born Republic
You are successful, but did not assassinate Prizark and were allied with NAPA: The area is freed of communist influence, the mission is considered successful, but Prizark has never been captured.
Setting Sail
You have failed, but are close enough to the coast to attempt to get a boat and leave.
Missing in Action
You have failed, and are so far inland that your only hope is to get to a friendly RV. However, the RV turns out to be a trap and you all die, but not before taking as many enemy as you can with you.
Revelation
You were successful, but did not kill Prizark, were allied with CDF and did not capture Lovotov or successfully transport him to the Russian border: You go to meet the NAPA rep and the Russians decide to use an atomic bomb, killing you all, so I'd really call this a "fail" However, if you succeed in taking Lovotov to the Russian check point, you'll get a Flawless Victory and the first ending.