OFP2 Dragon Rising Campaign Walkthrough
By BR
Dragon Rising
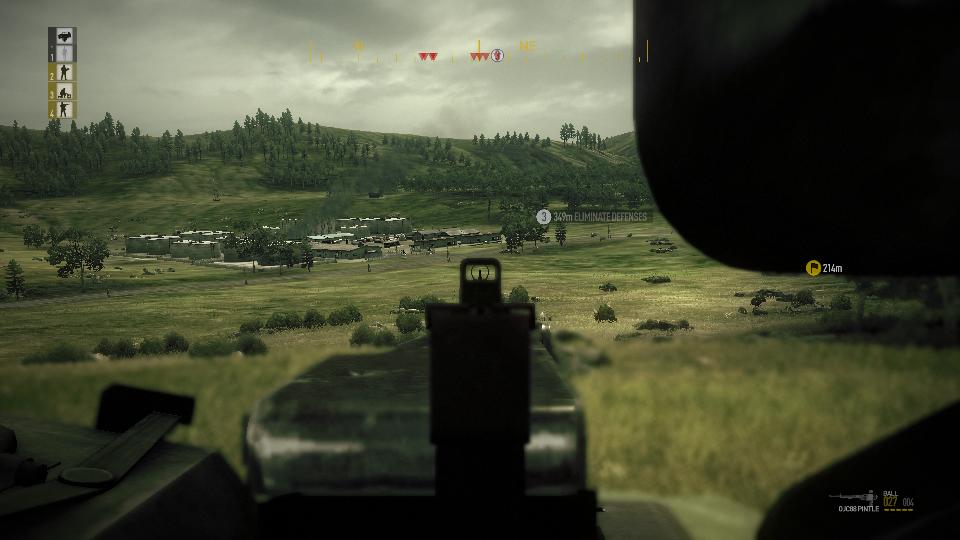
After the intro giving the back story, you are tasked with destroying a radar installation. Go
to the first waypoint and kill the soldiers that are coming at you from behind the small building.
After that do not go directly in, but head west, using the terrain for cover. When U get to map
grid 210 X6Y4, then head for the objective. Keep low and when you get within 33 meters of the radar
array, hit the dirt and crawl the rest of the way. Let your AI loons take care of any soldiers that may
come your way. Plant your bomb, crawl a safe distance away and touch it off. Unfortunately, unlike
the original OFP, there is no timer on these bombs, you have to blow them manually. Make sure that your
squad is clear before setting it off.
After the radar is down, the game will auto save and you will get instructions on how to call in artillery.
Ignore it for now, you can't use it unless you have line of sight and are within 1 KM of the target.
Shortly after that, you will get a message about clearing the landing zone of approaching enemy.
Head towards the suggested waypoint but hit the dirt just short of it, hiding behind a ridge at 210 Y2X3.
It will be hard to see through the grass, but if you are in normal mode, there will be a display at the top
and enemy will display as red triangles. Let your squad do most of the work, keeping a watch for enemy
trying to flank you.
Once the enemy in the immediate area is eliminated, a transport chopper will arrive and you can
choose to end the mission now by boarding the chopper. However there still is the SAM site to take out.
There is also a hidden SAM site and Sunburn site you need to destroy to get 100% success.
Make use of the ammo crates at 210 X8Y1 before boarding the UAZ left behind by the enemy.
BUG ALERT After using the ammo crates, the mouse wheel doesn't work anymore, so you can't zoom the map. You also can't use it to direct your troops.
Your troops should
automatically board when you get in as driver, if not use Q to bring up the command menu. Don't take the road, there
is an ambush. Instead go cross country to 22N X0Y5 being careful not to lose the UAZ down the side of the mountain, park and go on foot if necessary.
The hidden Sunburn objective will now display.
Approach to about 500 meters of it and verify the objective with your binos. Snipe all the guard that you can see and
carefully approach, eliminating all enemy as necessary. Plant your bomb and blow it up like you did the radar installation.
After the Sunburn is destroyed, get back in the UAZ and backtrack to the ammo crates. You want to avoid the possible ambush near 21N X6Y6 and you should rearm anyway. Now head northwest cross country.
You will be notified of the second SAM site when you get within 500 meters of it. Drive WNW towards a tower until you get an auto save at around
20N X9Y0. You will really need this save point! Get out and ready to engage. After the first squad is eliminated carefully approach the base from
the NE and kill all troops near the SAM launcher. Plant your bomb and blow it up like you did the previous target. Head back to where you
parked the UAZ, keeping on the lookout for patrols.
Now head to the #1 SAM site, avoiding the radio tower, as there is a patrol there. Drive directly to the site cross country stopping at
21M x6y4. From there snipe the troops on the hill at 21Mx9y1. Go down the hill, troops will come up from the SAM site. Once you reach map
grid 21M X7Y2 you will get another auto save.
Approach and there will be some radio traffic about a strong offensive position but don't worry about it, you will be told to engage. Your
troops will take are of the APC as well. You have a good vantage point. Now is
a good time to use your one artillery shot. Use the right shift key to bring it up. You have limited choices
until you get to "spread" Choose "tight". Before calling the shot, use the binos (hold right mouse button)
to get exact aim on the target. Call the shot and watch the fun! Then go back to your stolen UAZ and retrace your route back to the extraction
point. Board the chopper to end the mission.
Blinding The Dragon
This is a black op mission to destroy another Sunburn missile and radar installation. A secondary objective is to do this without being detected.
Head to the first waypoint, but hit the dirt just before coming to the road and let a convoy pass without engaging it. Fortunately the AI starts in hold fire mode.
Follow the waypoints as they come up. Do not open fire on the troops that you walk into at the 2nd waypoint, they are friendlies. Follow the
route and ignore the gunfire and camera shake. When you get to objective 2, wait for the radio chatter that says "We'll take it from here". Cross the ditch
and then crawl to the Sunburn, plant your bomb and backtrack to RP2 before setting off the bomb. Once the Sunburn is destroyed, you will be given a
new waypoint. Do not go to this one, as enemy troops are there and will spot you, instead head ENE totally bypassing any structures. Once you are
200 meters away from the structures, head directly towards the next objective, skipping the yellow waypoint. Use gullies for concealment and cover. When you
get within 200 meters of the objective, go left to grid 2C X8Y4. If you are careful you should get this far without firing a shot
and you and your squad should have no injuries, if not, revert to the last checkpoint and try again. There are too many solders at that radar site
to take on, use your one artillery strike on the radar. If you are lucky the artillery will destroy the radar, if not at least the HE rounds will kill enough
guards so that you can go up and plant your bomb. Go back to 2C X8Y4, and set off the bomb to clear the objective and get your next waypoint. Head
there avoiding contact. Once you reach waypoint 3, the mission will conclude. You should be able to accomplish this without firing a single shot.
United We Stand
Your trigger fingers are probably itching by now. This mission has plenty of opportunities for gunfire, including getting killed.
The primary objectives are to secure the beachhead, eliminate PLA spotters and any AT and AA teams. A secondary objective is to protect the AAVP from the AT teams.
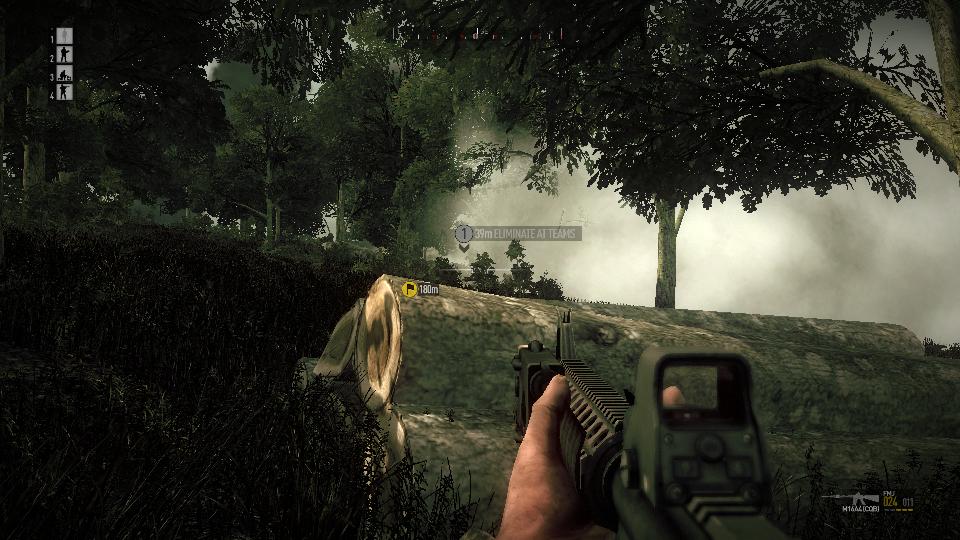
Crouch and head to the waypoint. Use these logs for cover.

The easiest way I found to clear out the AT squads is to lob grenades at them from 50 meters away while prone.
Repeat this tactic for all three AT squads and proceed to the farm buildings to clear a checkpoint. Walk behind the AAVP for cover as you head for the next objective.
You may get a message about looking for some AT weapons, don't bother unless you find a dead AT solider close by, as you will then be redirected to a ridge to take out atry spotters.
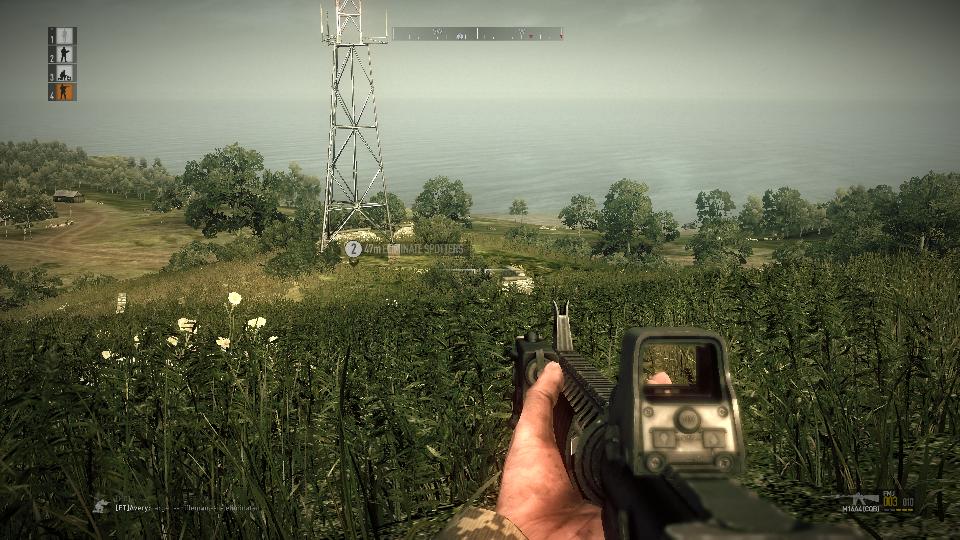
They are up by the radio tower. Go to the yellow waypoint and shoot all that you see. Be careful of the enemy hiding behind the bush, as indicated here.

You have a limited time to do this before the mission fails. If the objective doesn't clear after shooting everyone at the base of the tower,
check the little shed to the right as seen from the above view and all around the hill.
After the artillery spotters have been eliminated head towards the village and you will earn another checkpoint. There you are tasked with eliminating 3 AA soldiers near the village. You will get
another checkpoint after clearing the first AA solider, but this checkpoint puts you in the middle of a firefight if you have to revert to it, so try to stay alive, use the building at 2F X3Y7 for
cover. The best way to attack the remaining AA troops is to flank to the south, you'll have AAVP support from the north providing that you cleared the kill all AT soldiers objective. Once the AA soldiers are down
you will be ordered to defend the village from attacks from the south. Use the M2 Machine Gun at the south (you will get a checkpoint as you approach) and kill the infantry as it crests the hill.
Watch for friendlies in your LOF to the SE. There will be 2 waves, you should be easily be able to hold them back before you run out of M2 ammo. Once you defeat the 2nd wave the mission will conclude successfully.
Eagle Offense
The primary objective of this mission is to take over the airport. You may need to destroy the PLA armor to do this. After the in mission briefing, go to the first yellow waypoint. You will encounter one
or two enemies, your AI squad should make short work of them. After you reach that waypoint carefully advance and use your SMAW to destroy the 2 APCs. Then advance to the airport. Let the NPC friendly AIs go ahead
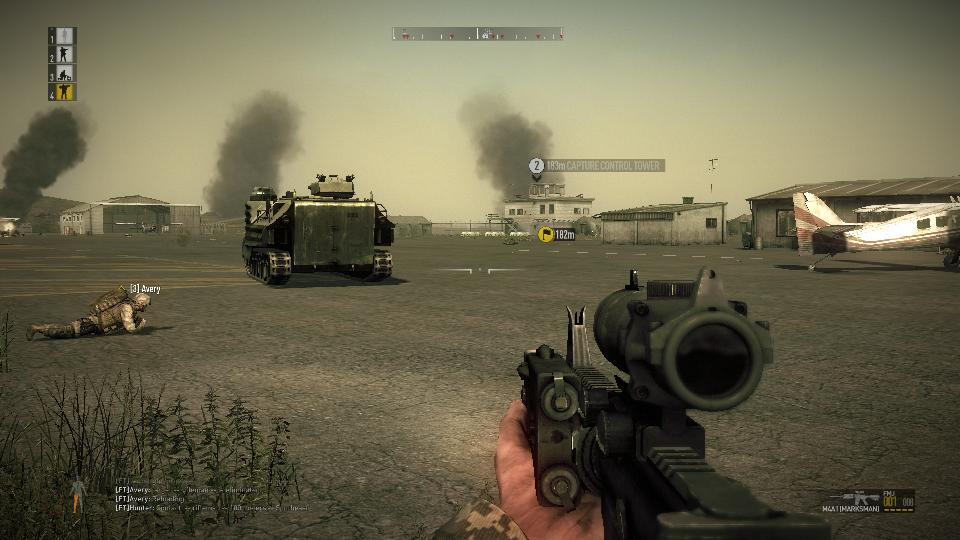
of you. Use the APC shown below as cover and shoot any enemy you can see from that position. Try to snipe the two guards in the 2nd floor of the control tower so you won't have to deal with them later.

Hold your position behind the APC, letting NPCs do most of the work until you get the message that you need to take the tower quickly. Move in, but stop just behind the tent. Reload a fresh magazine into your combat
rifle, then move from cover and kill the three men near the control tower before they get you. Run to the door under the stairway and roll a grenade through it. If that does not clear the objective you will need
to clear the building. Once the tower is clear, you will get a waypoint and you are ordered to hold the tower. The bad news is that a PLA attack helicopter is on the way and you have to get rid of it. The only
solution I found was to use the the last SMAW rocket. This will take several tries, but fortunately the checkpoint reload is at the right time to do it. Once the enemy chopper is down, call in the air strike and take
cover until the mission ends.
Powder Trail
The primary mission is to rescue and extract a downed helicopter crew. If you can, eliminate the AA site that shot the chopper down in the first place.
Go to the first waypoint and get in the empty hummer. You can let one of your AI crew gun, but you will probably do better. Make any AT soldiers your primary target. Don't try to drive the Hummer until the hostiles are down, otherwise they will destroy it.
Once the enemy is eliminated you will get the last known coordinates of the air crew and a new checkpoint. Proceed to the crash site coordinates, but do not try to take on the enemy at the roadblock, you are no match for them.
Bypass it by going east cross country and when you are out of sight of it, turn back west to suspected crash site. When you get there, you will find nothing but buildings, no downed chopper or crew.
Radio contact will report a column of smoke 1 KM away. You will report tracer fire, a suspected AA site. You will be authorized to engage at will and will have limited fire support. Head towards it, but slightly
west until you are in view of the Shilka. Although it's fun to blow up the Shilka with your SMAW, you will get credit for neutralizing the site by killing the soldiers manning it.
Head to the next waypoint there you will find the crashed chopper, but no crew. Radio messages direct you to the village. Go to the waypoint indicated and eliminate everyone at that roadblock.
Then proceed to the final objective, but stop just west of the village, taking cover behind the cinder block buildings. Now is the time to use your one Arti call. Go north so you have line of sight
to the area about 150 meters NE of the village. Call the shot, then hit the dirt and crawl out of harms way.
Killing the squad in that area will save a lot of grief later. You also will have two enemy troop choppers and two BMPs to get rid of. Your AI gunner (or you) can take down the choppers with the
Hummer's machine gun. Use the SMAW launcher to get rid of the BMPs. The first one will come at you, be ready to kill it as it comes around past the building. Sneak up to get clear shot on the 2nd BMP.
Once the armor is out of the way, carefully proceed on foot and clear the rest of the infantry inside and within 200 meters of the village. DO NOT attempt to rescue the air crew until all hostiles in the area
have been eliminated, otherwise they will be KIA and the mission will fail. Once it is safe, make contact with the air crew holed up in the indicated building. This will give you a save point. If the Hummer has
been destroyed (there is a good chance that it will be), you can still make it out on foot. Follow the yellow waypoint markers, that is actually the safest route, as it uses the terrain for cover. Once you make it
to the final waypoint, the evac chopper will come and and the mission will conclude successfully.
Hip Shot
Another black op mission. You are tasked with destroying a generator that operates the fuel pipelines. You must do this without blowing the whole place up. More or less follow the yellow waypoints, but keep
at least 100 meters away from any enemy. When you get near the little shack, approach carefully and kill the guard inside with one shot from your silenced weapon. This also triggers the diversion.
Hit the dirt when you are 180 meters away from the generator objective.

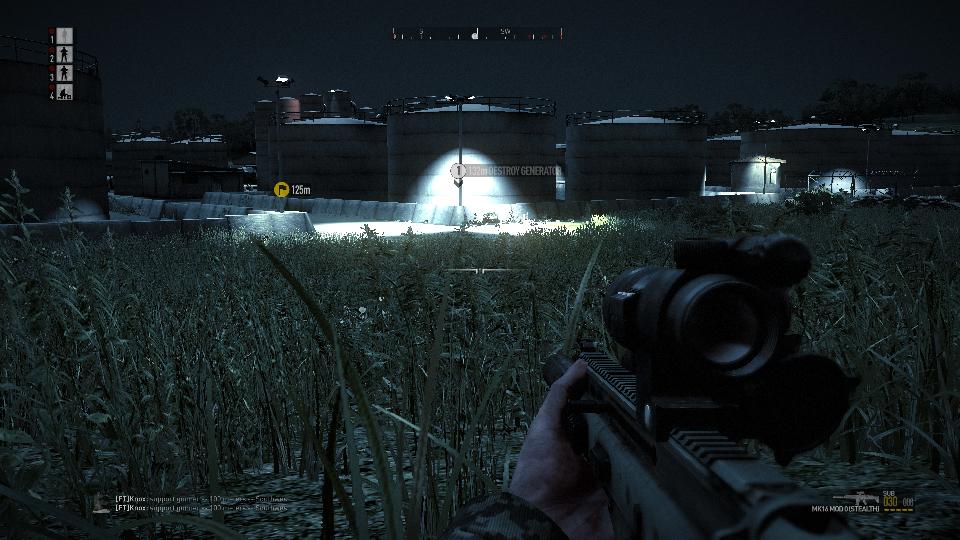
Avoid the gate area to the right, the best way in is shown above, slightly to the left. An alternative entry point is to hop the low wall on the north side of the oil tanks. Set your men to return fire if fired upon.
I have not been able to find a way to do this stealth, some of the places you must go are well lit and some of the guards have NV anyway. Run to the generator, plant your bomb, get far enough away and set it off.
This will give you a new checkpoint. Exit the way you came in but you will find hordes of troops directly between you and the LZ. There is no way you can take them on directly, instead head due east, up over the ridge.
Once you can no longer see enemy, turn and run northwest to the LZ, avoiding contact. You will get another checkpoint when you are within a couple hundred meters of the LZ.
All will seem clear, but there will be a squad right at the LZ, hiding behind ruins. Use grenades to clear them out and allow the chopper to land. Board the chopper to extract and end the mission.
Bleeding Edge
A straight infantry mission. The auto save checkpoints are in bad positions on this map, expect to die and have to retry a lot. Also you will go through ammo in a hurry unless you set your combat rifle to single shots. Proceed to the first two or three yellow waypoints. This takes you about 300 meters
from the secondary objective MG nests, so go prone and eliminate them. Next eliminate all enemy at the next yellow waypoint. Even though this is not on the objectives list, that hilltop is a perfect vantage
point for sniping the AT soldiers. You will get a new checkpoint after you clear AT soldiers and start heading for the next objective. Eliminate the 4 spotters and the two AA soldiers. Once that is done, go to the fuel
depot. There is an enemy truck you can repair and steal. Fall in behind friendly armor, let them take the hits and clear the way. However, you will be ordered to leave the convoy and flank to the right. Follow
the waypoints to the 2nd shelter. Drive just past the shelter and down the hill a bit to get this view of the target area.

Disembark and snipe all you can from this position before advancing. There will be smoke which you can use to your advantage to find cover before the enemy can see you. When you have eliminated all that you can
see, and get the message, "All are on the other side", go to the fuel depot, but do not enter it! Too many enemy hiding there. Instead crouch and use the west wall and oil tanks for cover and kill the enemy on the
north side. Depending on how the mission plays out for you, going along the east side of the fuel depot may offer better cover. BUG ALERT! Even though all defense positions were eliminated, I did not
get a new waypoint or objective. It turns out that you have to go in and clear everyone out of the fuel depot. BUG ALERT! Unless you go on the eliminate PLA AA teams before going on the fuel depot mission
you will not get credit for it, even if you go back and kill 3/3 AA soldiers before finishing the fuel depot part of the mission.
Looking For Lois
A spec ops rescue mission. Follow the orders, but remaining undetected will be a problem as you will run into a squad that you will have to eliminate on the way to the convoy. When you get there, the prisoners will have
broken out and armed themselves after the lead vehicle was destroyed by precision artillery fire, so this part is easy. You will get a checkpoint once all enemy in the area are down. On the way to the LZ you will
be spotted by an enemy chopper. Stay in the valley and use the forest for concealment. When you get near the end of the valley you will meet up with an enemy squad. Hit the dirt and let your AI loons catch up with
you and assist in the firefight. Once the enemy spec ops are down work you way around the mountain (don't try to go direct, it will be too slow and you won't have any cover) be prepared for combat the whole trip. When
you get to the LZ you will find it has been occupied by enemy forces. Clear them out, then the chopper will land. Before getting in the chopper, order your troops and the POWs to board first. Once you are all in, the
chopper takes off, successfully ending the mission.
Trumpet's Sound
Another infantry mission. Get in the hummer with your fire team and proceed as indicated. Before you crest the hill, get out and call two artillery shots to eliminate the the AT soldiers on the left and right side of the road.
Park the hummer at least 150 meters back from the crest, else it will get destroyed by enemy mortar fire. You will need to call three artillery strikes to clear this objective, there are four at your disposal. BUG ALERT?
If you don't use the artillery here, you can't use it later, to me this seems like a bug, but perhaps it is intended that the artillery does not have enough range to go further west. Once the objective clears,
run back, get your hummer and fall in behind the other hummers proceeding west. When you get another game checkpoint, do not follow yellow waypoints, but "break right" as instructed by Dagger One.
You have no more artillery shots, so you'll have to clear the next AT nest the hard way, with iron sights, for some reason you don't get scoped weapons on this mission. Set you weapon for single shot. Set your team to "fire on my lead".
Go to the right and sneak up on the AT position from behind, taking them by surprise. Once that is done, you are advised not to use the hummer, and you are retasked to take out the enemy mortar spotters at the monastery. Now
go to the yellow waypoint to get your game checkpoint, watching for enemy. At the next yellow waypoint there is a shed worth checking out. There are ammo crates with a scoped rifle. With a good scoped rifle, you
can follow the waypoints, snipe any enemy that you see and check each area for more ammo. After all the spotters are down, the mission will conclude successfully, but without the secondary objective being cleared.
Decapitation
A Spec Op Mission. Destroy the radio station and eliminate General Han. Follow the waypoints you'll see the head of a lone guard. Take him out with a head shot.
You will then find General Han, but you are told to hold fire "unless the situation deteriorates" Follow the orders from Capone to track General Han. When you go to the waypoint near an old pillbox, be careful! Han
is also heading in that direction. Stay to the NW side of the ridge line to avoid detection. After Han is 150 meters away, proceed to the pill box and kill the sniper hiding there, then continue to the next yellow waypoint.
Don't follow Han to the radio station, go to the indicated ridge. There you will have a great view for directing an air strike. Call the shot while Han is at the station, so you can meet two objectives with one shot.
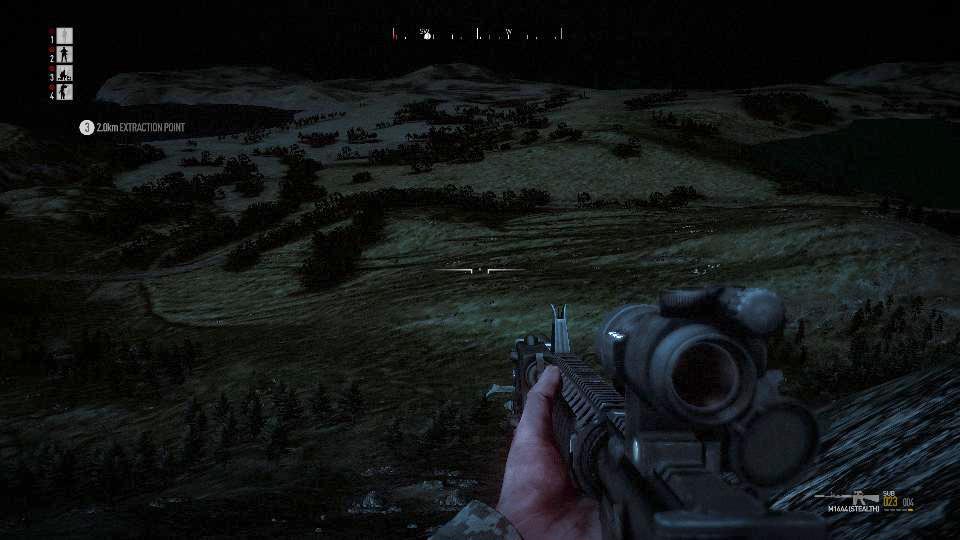
One that is done, you will get another game checkpoint. Now all you have to do is make it to the extract point alive. Don't head as the crow flies, enemy is right in the way, circle around. If you go the way I did
you will have this spectacular view.

Look down and you'll see a cross shaped tent (partly hidden by my rifle in the shot above) with a truck you can steal, there is nobody there, so take it and drive the rest of the way to the extract zone to end the mission.
Dragon Fury
This is billed as the last mission. Follow the waypoints towards the tank, but stop and use your NV rifle to clear the MG nest. When you are within about 400 meters of the tank, use your javelin on it. That will give
you another game checkpoint. Go to the MG nest you eliminated and look in the shed for an ammo crate. There ditch your javelin launcher and pick up a PF78 Queen Bee AT launcher. This is most important, you will be
unable to complete the mission successfully without it! Then eliminate the next MG nest. After the 2 MG soldiers are down, follow the waypoints towards the AAA objective. When you get within 200 meters of the Shilka
bear right, so as to go to the west side of the compound, using the buildings for cover. You may need to use two PF78 rounds to destroy the first Shilka, but the 2nd one always blew up for me nicely with the last round.
Clear the area of enemy and wait for friendly choppers to land. Board one as a passenger and order your crew in. Let the AI pilot control the aircraft, this is still an infantry mission for you. When the chopper lands at
the purple smoke area, get out. This is the last game checkpoint you get until you are well inside the naval base! You will have NPC AI troops with you, let them lead at first. Follow the yellow waypoints and shoot any targets of opportunity Take rounds for your Queen Bee from the AT soldier in the small bunker.
When you get to the hill at grid 17J 2XY4, watch out a guy hiding on the hill top, a sniper to the NW and various troops to the SE. Don't move from that spot until you can no longer see any enemy, then proceed to the next yellow waypoint.
Watch out for the MG nest at 17J X6Y7 and two guards at the gate at 17J X8Y7. By now you should have eyes on target and artillery support available. Go to the overlook and you will be able to see the soldiers.
At first it seems like there are only three, but they spawn from nowhere. Now is the time to call in the artillery. You only get one salvo, so you will have to snipe the rest of the soldiers without getting killed. The best
way to do that is to go down the road to the base. Tell your men to form column and set them to fire on your lead. Carefully advance using the hillside for cover, until you have a clear shot at a soldier about 200
meters away. Crouch and open fire. Use the concrete barricades for cover. Let the enemy come to you and pick them off when they get within 150 meters. Only after the enemy stop coming, and friendly soldiers appear should
you advance further. Once you get a new game checkpoint turn around and go back. Otherwise, you will come across General Zheng and he will not give up if there are any of his troops remaining. Retrace your steps back
up the hill, keeping an eye out for enemy coming to meet you. Circle around on the cliff above the naval base. You will find a tank, use your Queen Bee to destroy it. Eliminate the rest of the enemy on the north side
of the naval base. Once you do that, you will get objective complete, including General Zheng giving up without a fight, thus ending the mission and the campaign.
Return To Main Page
