Armed Assault Campaign
This campaign has several points in which one can just play straight through executing only the primary missions or you can play one or two auxiliary operations. Beating the auxiliary operations
will usually reduce enemy forces at the primary objective, so they are worth playing from a strategic standpoint, as well as getting full value out of the game.
Transport
You are riding in a Hummvee on the way back to base when you receive a radio call that Corazal is under attack. Stay in the Hummvee until the game auto ejects you.
Get out and seek cover. You can't beat this one, stay hidden until the order is given to retreat. Proceed to the indicated waypoint and board the M113 to end the mission.
Map: Beaten Dog
-
Sniper and Convoy
Aux Mission
After the cutscene, head for the water tower, but don't go on it. While it looks like a great vantage point, you'll stand out like a sore thumb and quickly get picked off. Instead use the rocks NW of the tower for cover
and position yourself to get this view of the road. Actually there would be better places to snipe from, but the game won't let you get too far from the water tower without concluding that you are AWOL and giving you an automatic fail.
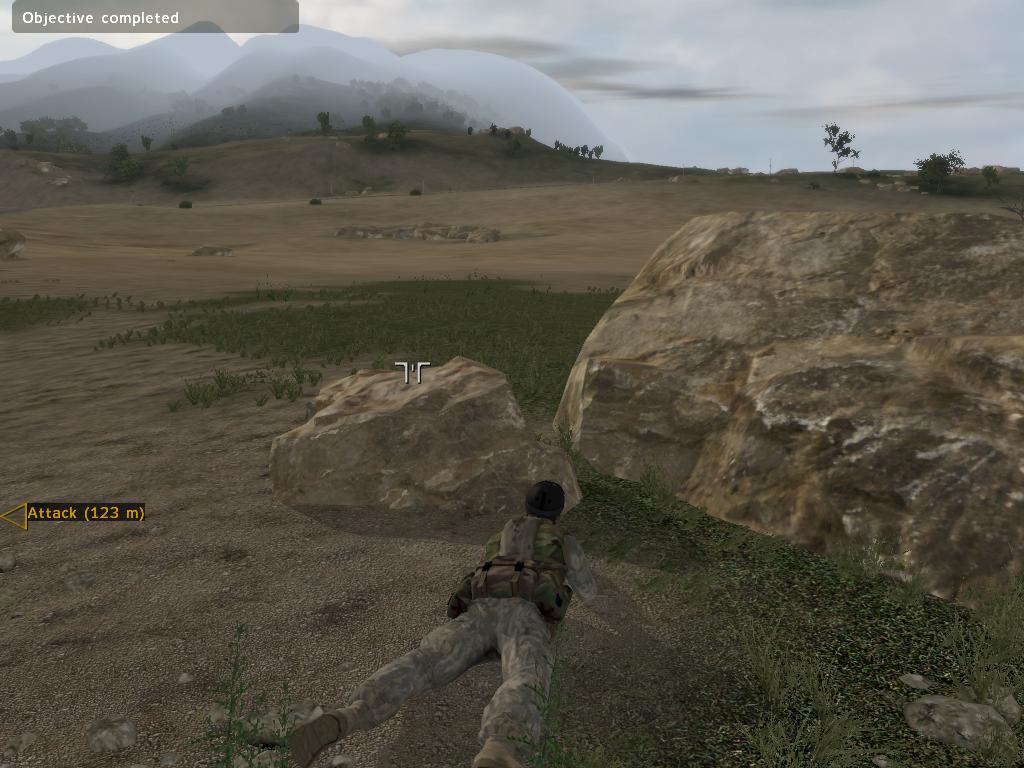
Hold fire until the lead vechicle is blown up by a friendly IED. SAVE. Start picking off soliders as they come by your point of view. Remember to duck behind the rocks for full cover when reloading, watch your flanks and change position to the other
side of the rocks. When the game says that you have completed the objective, you can go to the waypoint indicated to end the mission, but bear in mind that there is still enemy about, so either take them all out first or run like crazy to avoid being hit.
-
Direct Hit
Aux Mission
Work your way to the notch at the north of the base and take out the sole guard with your silenced weapon. Crawl up to the Shilka and plant your satchel. Now crawl up the hill to the west, watching out for patrols.
Avoid detection if at all possible. Get in a position where you can hit the two BMPs and the Shilka to the west with your rockets. SAVE. The other Shilka is the one you planted the bomb at earlier. Touch off your bomb open fire on the other armor.
Hit the dirt as soon as the the objective completes and be prepared for troops rushing your position.
Head back to the boat, but there is a good chance that it will be destroyed before you reach it, so you might as well go past it to the secondary objective. The best route to avoid detection is to hug the shore until you get to Gf52 then head NE to the
objective, using bushes for concealment. There are M2 machine guns all around this camp, choose your path so that you have to deal with only one of the M2s at a time.
The objective is well guarded, you will have to shoot ten or so guards to get to the plans, which are in the shelter next to the helicopter.
Even if the boat hasn't been destroyed, steal the chopper anyway for an easy return to the extraction point to end the mission.
-
Beaten Dog
Primary Mission
You are a machine gunner. Head to the point indicated hit the dirt and fire at will. You can't beat this one either, just keep low and stay alive. There will be a cut scene in which you are moved to the east side of town to defeat a flanking manuevur.
Take cover behind the sandbag wall and engage. Here your team will prevail. Go as commanded to the truck to end the mission.
Map: Dolores
In this map, you can choose only one support mission.
Construction Convoy
Aux Mission
Go to the church where you will find a red pickup truck with a cap parked in the church yard. Drop all your ammo and take a mine and all the satchel charges. Plant the mine at the T intersection in town. Put the first satchel in the cross walk. Put another
in the road heading north, one 50 feet from that, one at the city limit signs and the rest at 100, 150 and 200 meters out. Those who have played the single mission Convoy Ambush will be familar with this strategy. Don't worry about the civilians roaming about,
when the convoy approaches the chuch bells will ring and they will all take cover. Run back to the church and rearm with 5 rockets and the rest Stanag magazines. Go prone on the roof of the building as shown. Remember to load your rocket launcher first. SAVE.
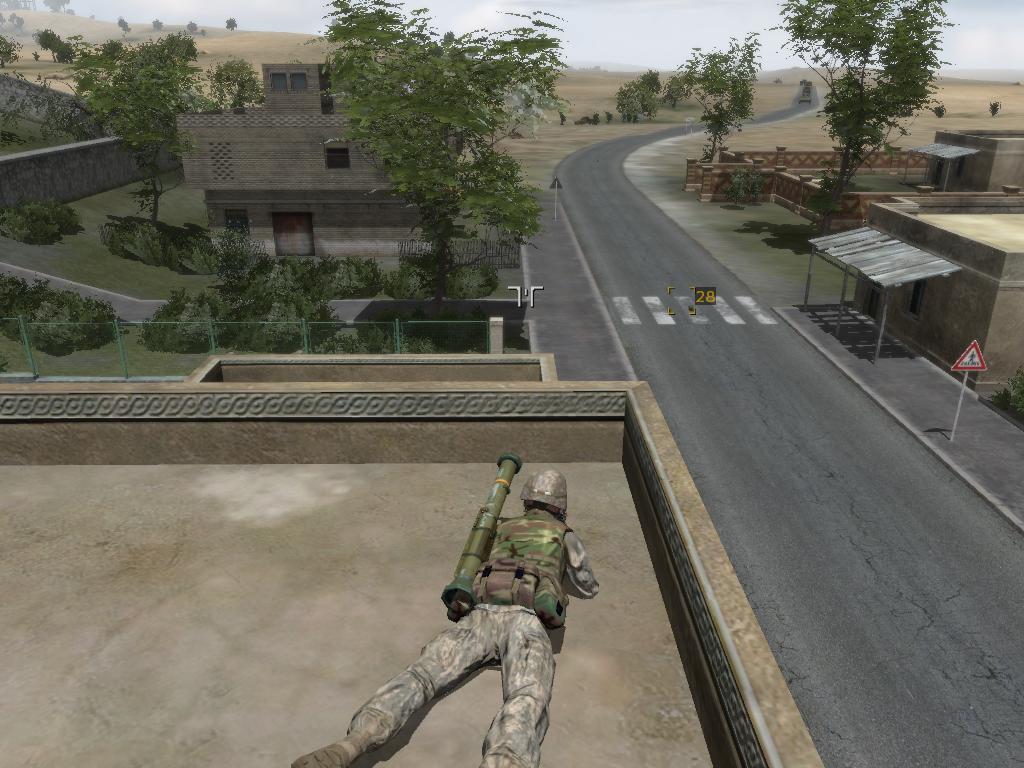
When the first truck is in the crosswalk touch off the bombs. Use your rockets to destroy trucks that the bombs missed. Hit the deck and switch to your aimpoint to kill the surviving BMP crew before you try to fire any more rockets. If the convoy ducks out
of view, get off the building and run to the hill by the chruch, from there you will be able to finish off the convoy. Once the objective completes, run back to the boat and get in as gunner to end the mission.
-
Unsurrounding
Aux Mission
In this mission you are cursed with AI at are dumb as dirt, so after serveral attempts I gave up and chose Construction Convoy as my Aux mission for this map. If anyone wants to contribute a successful solution to this map, contact me at cobsquad.com
-
Dolores
Primary Mission
Plant three of your bombs under the bridge at the west. The other two go at the west support pillar. Yes, this means you have to swim. You need to plant at least 3 bombs in order to successfully blow up the bridge, but you might as well use all 5, the game doesn't
let you keep them. Run to the hiding place indicated. Blow up the bridge when ordered. Get 4 AT rockets and a launcher from the crates.
Hide between buildings and pick off armor as they come into view. There will be at least a T-72 to engage. You can also go up on the hill at Fh71 and destroy a tank on the other side of the bridge to the east.
Ignore the message about the hidden boat, I was never able to find one. When you run out of targets in town, go NW from the Fh71 hill, there you can take a Jeep to get to the next waypoint. If you spend enough time in town killing tanks, you won't have
to do the 3rd objective, but can proceed directly to rendezvous point Diamond to end the mission.
Map: Battle of Somato
The Hotel
Aux Mission
A straightforward sniping mission. Go to Fc64 and position yourself for a good view of the balconies on the north side of the hotel. The officer will come out on the third floor balcony and just stand there. Snipe him and crawl out of view of the
rooftop gunners, then run to the extraction point to end the mission.
Sanitize
Aux Mission
The best way to survive this one is go inside the shed, go prone and wait for targets to come into view. Once your commander calls "clear" proceed to the waypoint. Once you join up with the other group you will backtrack and enemy will come out
of nowhere. Hit the dirt and engage at will. Your forces and you will be directed to return to the HMMWVs to end the mission. You may have to wait a bit for the rest of the squad to get back, the mission won't end before then.
-
Battle of Somato
Primary Mission
You are in command. Take the drivers seat and order 2-4 in your Hummer as anywhere. Order 5 and 6 into the other Hummer. Head to the waypoint. The game will auto save. When you get to the search and destroy waypoint, drive towards it, stopping 90 meters
away and switch to gunner. Order driver forward and as soon as enemy is in view, lock the missle on the middle BDRM and fire. Order driver to reverse and reload. When your TOW is reloaded, order forward, lock onto next target and fire. Proceed in this
manner until all armor is destroyed. Make sure that you have three TOW rounds left after this. If you don't, you might as well restart, because you will need them later. Proceed to next waypoint and park here. SAVE
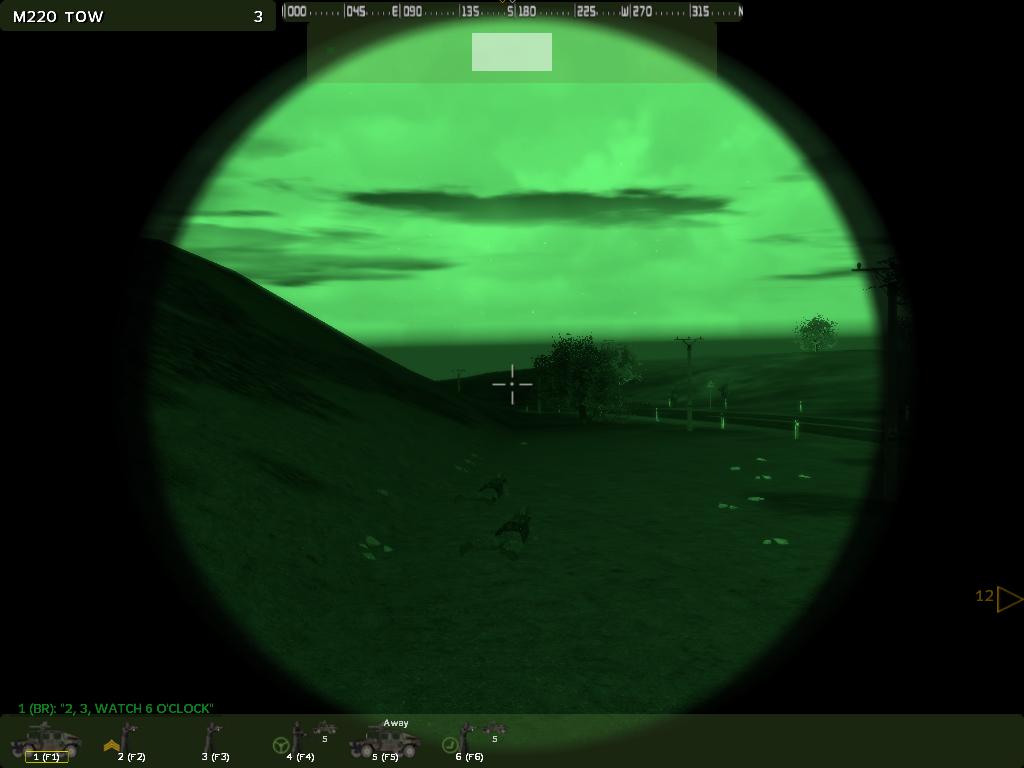
Order the AI out of your Hummer so that they can take on the infantry. Get in the gunners seat and be ready to ambush two BMPs at are coming up the road. They may also crest the ridge directly in front. A third armored unit will follow. Once the three
are destroyed, the objective will be completed and the game will auto save. Proceed to the next objective, stopping 20 meters short of the waypoint. Have all, including yourself disembark. You are out of TOW ammo, so the Hummer is useless.
Take cover and let the AI squads finish the mission.
Map: Dawn of Hope
-
Awakening
Aux Mission
Get in the M2 machine gun and pick off as many targets as you can through the rain and fog. Alternatively, you can just hang out in the barracks until the order is given to board the truck. Head for the indicated waypoint. The quickest way to get there
is just to head straight up the hill. It's slow, but all the roads take much longer. When the troops have boarded go back to the starting point. It's all down hill, so you'll make it with time to spare. If you haven't noticed this is the same as the
single mission Delivery Boy but easier because there are no winding roads to deal with.
-
Night Patrol
Aux Mission
Although the game suggests that you walk a patrol beat, you will proably miss at least one of the sabatours, and lose the mission. But it so happens that the mission begins with you standing next to a ladder. Climb the ladder and you will find yourself
atop a tall chimney, from which you can survey the whole perimeter. The first attempt will be from the SW, through the gap in the fence. Pick him off. The second attempt will be from the same direction. The third attempt will be from the NW, he may try to enter
through the west gap or the SW gap in the fence. The fourth attempt will be to the north, you'll see him crawling down the road. The fifth and final attempt will be from the same direction as the fourth. Once you kill the fifth sabatour, the mission concludeds
successfully.
-
Dawn of Hope
Primary Mission
Get in the indicated vechicle, pick up the squad, drive to the airport and get out. You are in command of this 10 man squad. Grab yourself 4 rockets and a launcher from the crate. Using the wall for cover, take out the BMP and finish off the crew.
Head east to the next waypoint using airport buildings for cover. Put the AI into danger mode and have them stay crouched. As you approach the waypoint, you will get new orders, there will be a short cutscene in which you are taken in a Stryker
to the next objective. When you get auto ejected, run to the lead Stryker and get in as gunner. SAVE. When the Stryker gets to the intersection, order it to halt and get out. Get ready to dispatch a BMP coming from the west. Hopefully your squad
will cover you. Once the BMP is out of the way, get back in the Stryker as gunner and do as much damage as you can until you get new orders. Go to the next objective and engage. By this time the weather will clear and you'll have air support, ending
this mission.
Map: Reclaiming
In this map you can choose only one support mission. Both are chopper missions.
-
Chopper Assault
Aux Mission
Board the chopper and head to the objective via the north coast. Stay below 100 meters and the Shilka will have a hard time hitting you. Let your AI gunner and the other choppper do most of the work. When you get the waypoint to head back, go back
the way you came, land and get out of the chopper to end the mission.
-
Convoy Attack
Aux Mission
The strategy is similar to the single mission Gunship, but there are no real AA installations to worry about. Switch to manual fire and use your TOW missles to take out the T-72 and BMPs on your first pass from nortwest to southeast. Then make a pass in the opposite direction.
Continue making passes in this manner until the convoy is destroyed.
After your TOW missles are used up, switch to FFAR, although if you target carefully you can destory the convoy with just the TOW missiles. If you manage to use up the TOWs and the FFAR, turn off manual fire and let your AI gunner use the cannon to finish off the rest of the convoy. Once the convoy has been eliminated, retrace your
route back to the starting point.
-
Reclaiming
Primary Mission
Get in the Stryker and order your troops in back as well. The AI driver will take you to the drop off point, and you will be auto ejected. You do not have an AT weapon but if you wait long enough, the other AI squads will take care of the Shilkas. Head to the next objective and when you get to the road hit the dirt and wait. The AI will clear it as well.
You will have to kill 3 enemy troops to get to the waypoint and set the next waypoint however. Tell your squad to wait for you while doing this so you don't lose them. Believe it or not the safest approach is to head down the main road, cross the first
bridge and take cover at the building to the right.
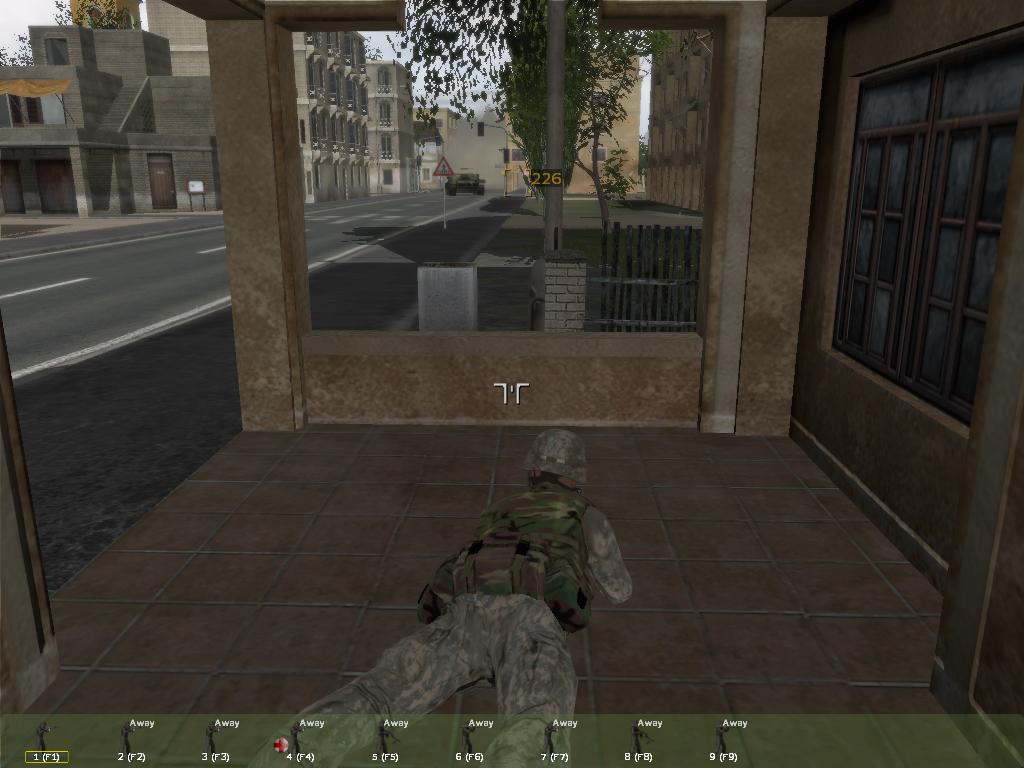
From this point on it gets pretty dangerous. Wait for your squad to catch up with you, then order them to go prone. Figure on losing a lot of them anyway. Run to the next road, and go south to avoid
the T-72 on the next bridge. Make you way to the next waypoint. If you can make it there alive, the mission will end successfully.
Map:Into Enemy Territory
-
Big Bang
Aux Mission
A black op mission similar to Direct Hit, however you have two men in your command. Also you are tasked with eliminating all human presence at the base, as well as destroying two trucks. Order your AI to hold fire. Have #2 drop two satchel charages.
Pick them up youself. Go to this vantage point, call out targets. When all are ready, have all open fire. You need to pay attention to the open shelter where the radio is, indicated here. Don't let anyone get near it.
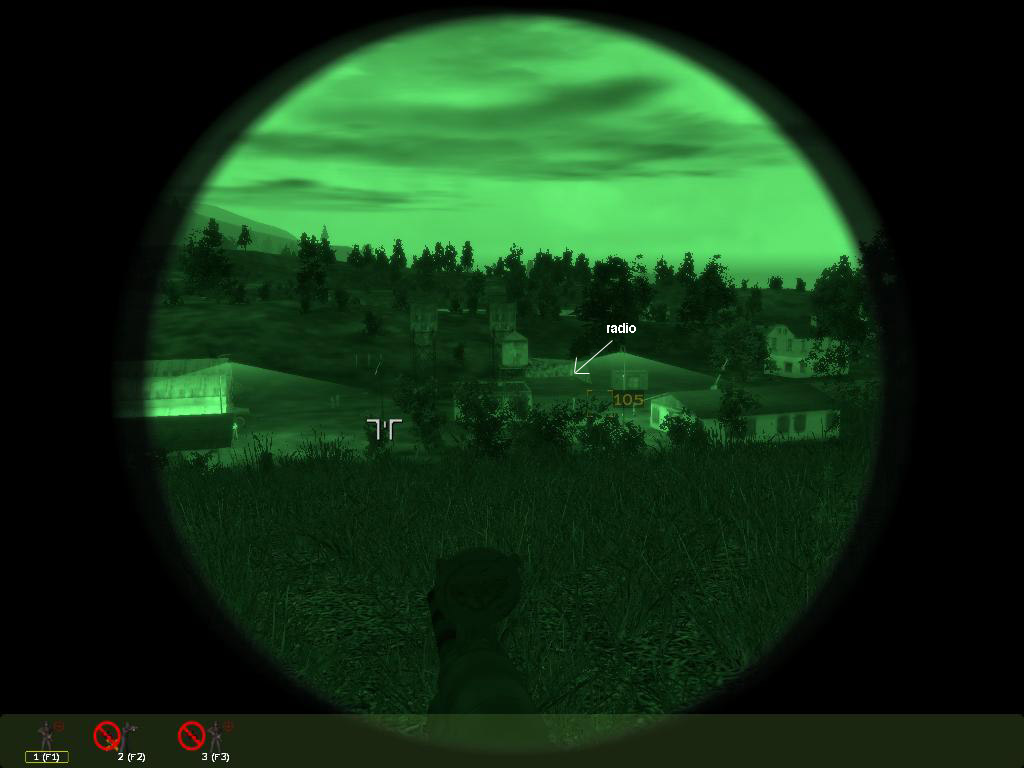
This will put off the arrival of any renforcements. If men attempt to drive off in the trucks either shoot them through the windshield or shoot out the tires. After all human presence is eliminated, plant a satchel at each truck. Set a 60 second timer in
case you get shot, this mission has respawn to another unit, so if you get killed, the mission can still complete successfully. Leave the base, touch off the bombs and run to the extraction zone. Board the chopper to end the mission.
-
Big Bang2
Aux Mission
-
The mission starts with you in command as gunner in a gernade launcher Hummvee. The AI driver will quickly get you killed so order all to halt and switch to the drivers seat. Order all to "wait for me", then go full speed to the waypoint. You should be able
to dodge bullets and your AI gunner does a passable job. As soon as you get to the two truck convoy, stop, switch to gunner and use the gernade launcher to kill all aboard the two trucks. Once the objective completes, switch back to driver and return.
Even if you get killed, the mission will still end successfuly as you can Team Switch back to the other Hummvee, safe and sound at the starting and ending point.
Chopper Transport
Aux Mission
Get in the chopper and head straight to the next objective, watching your altitude. You are over friendly territory here, so you don't have to worry about AA attacks. At about 900 meters from the waypoint you will clear the last hill and the landing area will be in sight. SAVE. You want to descend as quickly as possible and
land at the indicated helipad. You don't have to be right on, it, get within 20 meters so and the troops will still board. As soon as all have boarded, the waypoint will change to your final destination. Fly at 50 meters above ground level to avoid
detection by AA batteries on the big island and this will also make landing quicker. This landing zone is a bit tight, you must land between the building and the trucks to succeed. You should be able to complete this with two minutes to spare, if not,
you need more chopper practice.
Into Enemy Territory
Primary Mission
Head to the first two waypoints as indicated. At the second waypoint go to the ammo crates and get yourself 4 rockets and a launcher. Put your troops crouched in danger mode. Head for the waypoint in the road, right at the barracde. As soon as the first BMP clears the horizon, fire at it, then order the snipers
and artellery in on the radio. Engage all armor as you see it. You may need to go to the crates and rearm. NPC friendly forces will advance, so don't mistake them for enemy. When all seems quiet, SAVE, just in case there are any surprises, then wait.
You might want to use X4 time so you don't have to wait so long for the mission to end.
Map: Gryphons
-
Armored Fist
Aux Mission
This is almost identical to the single mission of the same name, so I've just cut and pasted the description below:
A fairly easy tank mission. Switch to the drivers seat before going to the first objective. You will have to call out targets to your AI tank crews, they are not that good at spotting them. Watch out for AT soliders. Keep moving and duck behind
buildings for cover. After taking the first objective, call in support if you need it, but you should be able to take the first objective without serious damage.
Follow the road or go cross country to the next waypoint. Either way will bring you to the entrance of the next base. Stop just outside of the wall, switch to gunner and use the sabot on the T-72 before it has a chance to fire on you. Switch to MG and take
out troops. Your commader will also assist with his M2. When things seem quiet, tell all to "wait for me" as they will just get in trouble if they advance with you. Advance slowly until you can see another T-72 as shown. Take it out before it sees you.
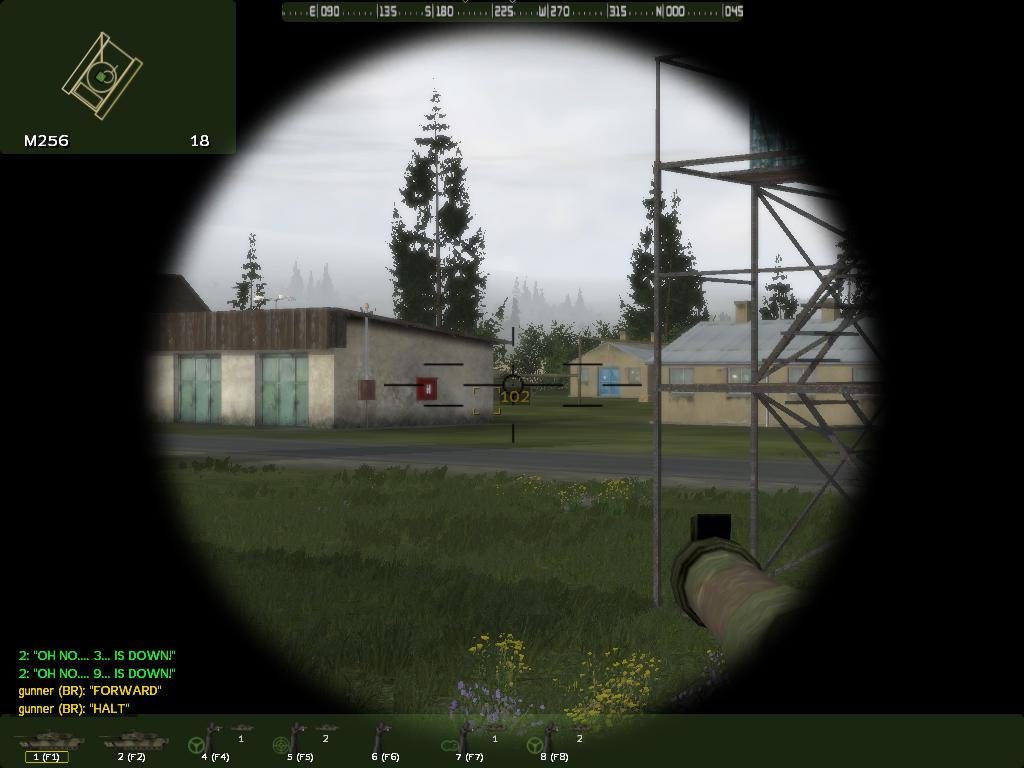
Switch back to the drivers seat and make you way around the base, eliminating the rest of the enemy forces. You may have to do a lot of switching between driving and gunning, as the AI seems to have fallen asleep during this part of the mission.
If the objective doesn't clear after making the rounds inside the base, you'll have to check the outside. At least there are no stupid civilians to worry about here.
Once the objective clears, you still need to hold the base. This would be a good place to use your SAVE. The first contact will be a BMP coming from the south. Set up an ambush with your tank here.
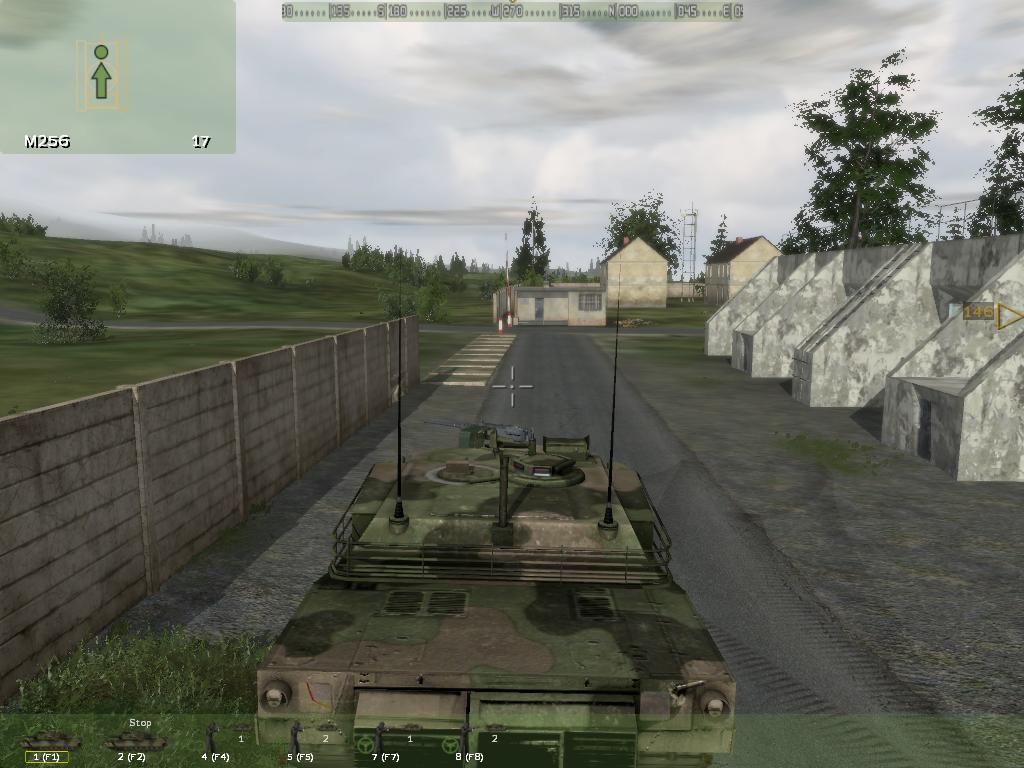
Once the armor and the squad coming from the south are eliminated, the mission is completed.
-
The Camp
Aux Mission
I have never beat this one completely. The best I have done is to protect the defensive postion engineers, but the main engineers always get killed, sometimes just after they complete the job. The bulk of the attacks come from the NE, but a UAZ with
a machine gun and some other troops come from the east.
-
Gryphons a.k.a. The Great Battle
Primary Mission
Another chopper mission. Board your chopper, start the engine, but don't take off until the side chat says all troops are aboard. Then take off and keep formation with the leader. There is no AA resistance at this point, you just have to concentrate on
the terrain and avoiding mid air collisions with friendlies. Hover where indicated. Switch to manual fire and choose TOW missles while you are waiting for the game to auto save. You won't have time after the auto save as T-72s appear out of nowhere and they
are pretty good at shooting down helicopters. Use your TOW missles to eliminate the tanks. When you have cleared most of them, you will get orders to land at Tandag base and rearm, but don't do it until all red targets are gone, otherwise you will be shot
down while attempting to land. If you are low on ammo and have to land, then get 1000 meters away from any enemy, and come in just above the treetops to avoid getting hit. After a successful landing, you will be rearmed and the game will auto save. Before
taking off again, get out, go to the ammo crates and get yourself 4 rockets and a launcher. The next part will be the hardest part of the mission. There will be two Shilkas that you have to take out on the first pass or most likely you will get shot down.
There are also AA soliders to make your life miserable. Make sure that manual fire is still on when you take off. Don't go straight in, the Shilkas always seem to be able to see you first when coming from that direction. Instead fly 50 meters AGL and go to Ge-26. Hover and turn to face
the objective. Once you destroy all the armor, the objective completes and you can head back to base. Be aware that there are still AA soliders!
The best thing to do is to duck down in the ravine ENE of the enemy base, and take the long way around back to base. If you wind up crashing the chopper and surviving, you can use the rocket launcher to destroy the armor and walk back to base.
I did it that way once, but it's a lot harder, because you also have to avoid getting killed by infantry.
Final Countdown
There are no aux missions at this point.
After the cutscene you will ride up in a Stryker and be auto ejected on the bridge. Form column, go into danger mode and head for the waypoint, but not directly, go up the road into town. There are hostiles near the waypoint, and you can use the town
buildings for cover. Order your troops to hit the dirt. Let the NPC friendlies do most of the work. Once you are off the bridge, you will find that number 11 is the driver of a Stryker and 12 is the gunner. Get in and follow the dirt road to this house
at Hb47.
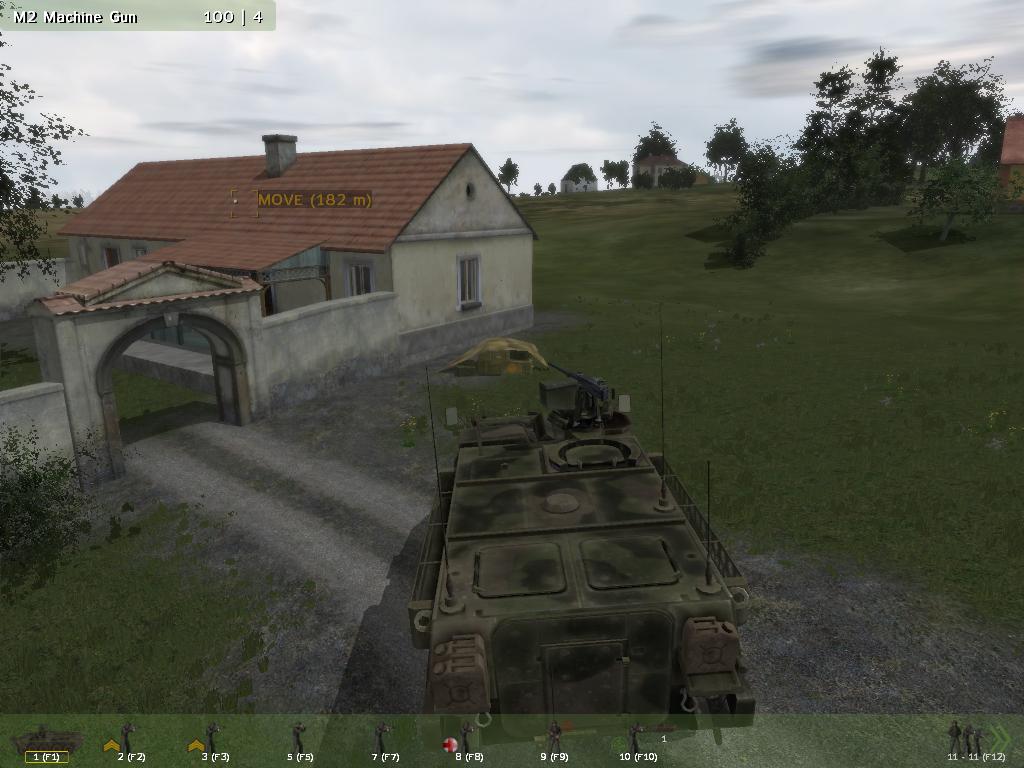
Notice the ammo crates. Equip youself with 4 rockets and a launcher. Take out the BDRM. By the time you do this, the NPC friendlies will have completed the first objective. Have all your troops wait for you while you take care of the side
mission to check out the prison camp in the Stryker. Park the Stryker just outside the fence. Get out of the Stryker and walk to the waypoint for a cutscene with really bad voiceovers.
After the cutscene, the briefing changes. You'll find a SLA small camp has been added to the Main Camp that you saw in the first briefing. Continuing gives a cut scene in which the enemy blows up the bridge to the south. You start with A Hummer and two crew.
Order them into the Hummer and get in yourself as driver. Head for the waypoint. There you will pick up 7 additional soldiers. Get everyone out of the Hummer and SAVE. There are AT soliders around. Wait until "Team Switch Available" flashes
on the screen, then order any troops you have left into the Stryker. You will get a waypoint to "check the camp". This refers to the Main SLA camp at Gj41. Head there. You will encounter a T-72. Use the terrain to avoid it, you are no match for it.
Go into the base and drive around, letting your gunner kill infantry. Eventually, you'll get killed.
-
Ending 1
Use Team Switch to switch to the tank commander. Change to the driver's seat. Head to the waypoint. When you are 100 meters away, change formation to line. Although the waypoint changes to "wait" that's a bad idea, you are out in the open
and a sitting duck for any AT soliders. Keep moving towards town and engage at will. You will eventually get the waypoint to "check out the camp". Go there and your AI tank team will take care of the enemy and conclude the mission.
-
Ending 2
Use Team Switch to change to a chopper pilot at the Pita airport. Board as pilot, and have the AI get in as gunner. But you'll want to use manual fire. Head towards the waypoint, but cut through this pass at Hf40.
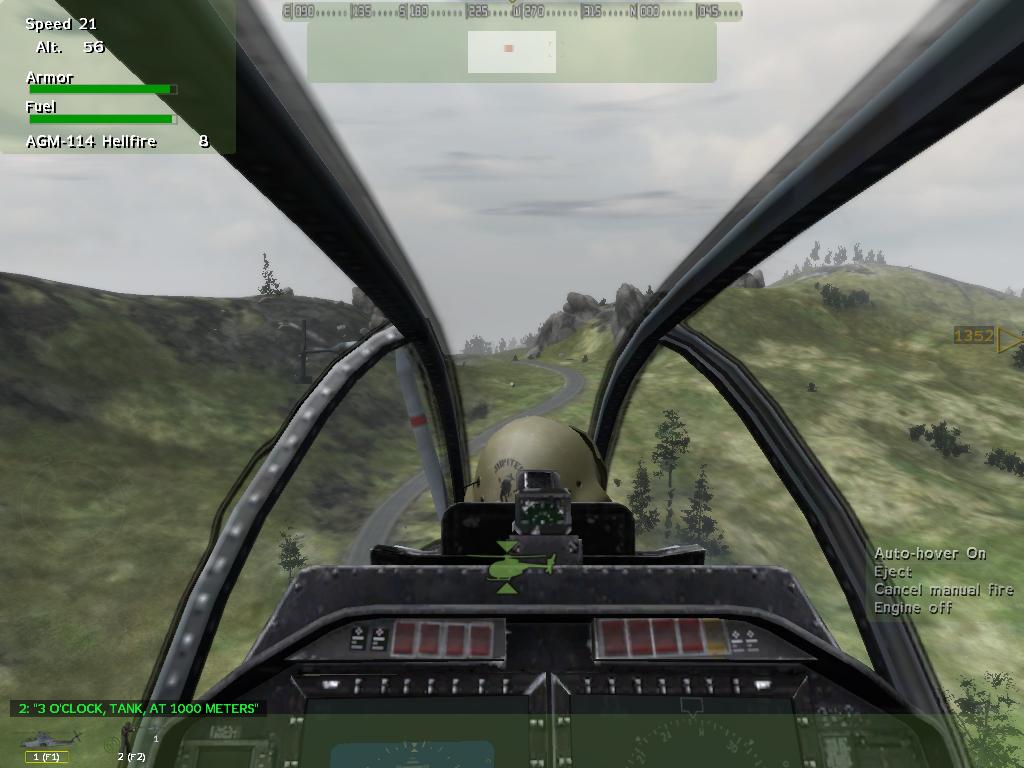
This will give you some protection from the Shilkas, which hopefully you can destroy before they shoot you down. You have 4 choppers you can go through. If the game doesn't end by the time you have gone through all the helicopters, you can
always switch to the tank commander as in Ending 1.